menu.png

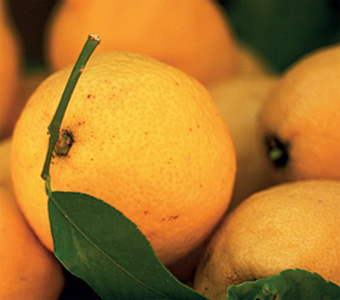
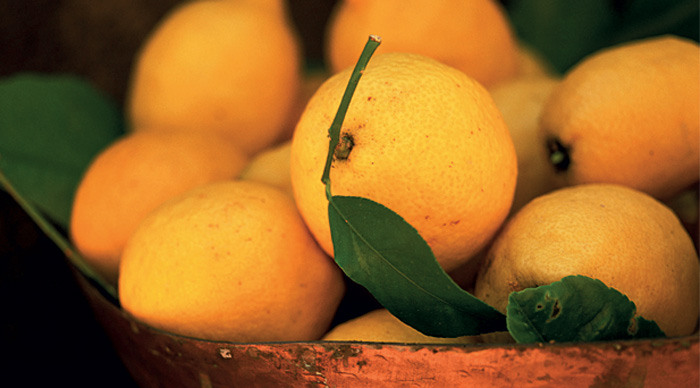
36 ways to clean your house with lemon
36-ways-to-clean-your-house-with-lemon
Dr. Penny Stanway from The Miracle of Lemons
 
Everyone loves the fresh scent and tangy taste of lemons, but you can also use lemons as a fantastic natural cleaning product. Use lemons for many household chores and can help keep your home fresh, clean and sparkling. Note that it is fine to use bottled lemon juice instead of fresh lemon juice for household tasks.

Using lemon as a air freshener

1. To make the air in a room smell fragrant, add a few drops of lemon essential oil to a spray bottle half filled with water, shake well and spray.

2. Use lemon to scent your clothes, just leave thinly pared strips of lemon peel to dry out well over several days, then put them in your wardrobe or chest of drawers.

3. Add strips of dried lemon peel to a bowl of fragrant dried flowers or leaves for a pot pourri to scent a room. Sprinkle the contents of the bowl every couple of weeks with a few drops of lemon essential oil to refresh the aroma.

4. Make a wonderfully scented pomander by studding a lemon with cloves, then tying some ribbon around it so you can hang it up.

5. Deodorize the drain of your kitchen sink by putting the juice of a lemon into a glass of water and pouring the lemon water down the plughole.

6. Remove the odour of fish, onion or garlic from your hands by rubbing them with fresh lemon juice.

7. Freshen your vacuum-cleaner bag by sprinkling a few drops of lemon essential oil on to a paper tissue and putting this into the bag.

8. Keep your fridge smelling sweet by putting half a lemon on a saucer.

9. Make your air humidifier smell good by adding a few drops of lemon juice to its water container.

10. Make a waste-disposal (garbage disposal) unit smell fresh by putting the peel of a lemon through it and rinsing with water.

11. To freshen a carpet or rug, mix 10 drops each of lemon and lavender essential oils into 125g/4½oz/1 cup of bicarbonate of soda (baking soda). Put in a covered container overnight so the bicarbonate of soda absorbs the oil. Next day sprinkle the mixture over the carpet or rug, then vacuum up the powder.

Using lemon as a household cleaner

12. Remove grease with lemon juice.

13. For a natural cleaner for wooden, laminate or ceramic-tiled floors, pour into a spray bottle 240ml/8fl oz/1 cup of white vinegar, 240ml/8fl oz/1 cup of water, 5 drops of lemon essential oil, 2 drops of tea tree essential oil and 5 drops of lavender essential oil. Spray this mixture on to the floor and wipe clean with a microfibre cloth or a mop. Alternatively, add 4 tablespoons of white vinegar and 10 drops of lemon essential oil to a bucket of water and mop the floor with this scented solution.

14. To clean and deodorize a microwave cooker, mix 30g/1oz/¼ cup of baking soda, 1 teaspoon of vinegar and 6 drops of lemon essential oil together. Use a sponge to apply this paste to the inside of the microwave. Rinse with water and leave the door open for 15 minutes to allow for drying.

15. To remove limescale from around a plughole or tap, rub with the cut end of half a lemon, then rinse.

16. To clean windows, rub the cut surfaces of a lemon quarter over the glass, wipe off with a damp cloth, then dry with a dry cloth.

Using lemon for polishing

17. Use lemon essential oil to polish surfaces, as its limonene acts as a solvent, dissolving old wax, fingerprints and grime.

18. Brighten copper cookware or ornaments by dipping half a lemon into salt, bicarbonate of soda (baking soda) or baking powder, then rubbing it over the surface. The lemon acids dissolve the tarnish, and the salt, bicarbonate of soda or baking powder act as a mild abrasive to clear it away. Rinse with water and dry with a cloth or a paper towel.

19. To make a furniture polish, combine in a glass jar 2 parts olive oil with 1 part strained fresh lemon juice. This polish accentuates the beauty of the wood; it also nourishes it and prevents it from drying out.

20. Polish dulled surfaces of aluminium or chrome objects by rubbing with the cut surface of half a lemon, then buffing with a cloth.

Using lemon as a disinfectant

21. Add a squeeze of lemon juice to disinfect drinking water that you think might be contaminated with bacteria.

22. Use lemon essential oil to clean kitchen, bathroom and other surfaces that are likely to be contaminated with bacteria. Several of its constituents, including limonene, have antibacterial properties.

23. Disinfect kitchen chopping boards with lemon juice, as it contains citric and other acids, and bacteria dislike an acidic environment.

Using lemon to remove stains

24. If your hands are stained (for example, after peeling onions), rub them with lemon juice to remove the stains.

25. To remove sweat stains from clothes, scrub gently with half and half lemon juice and water.

26. To remove stains from white laundry, mix 1 tablespoon each of lemon juice and cream of tartar and apply the mixture to the stain. Leave for a few minutes, then rinse with water. For persistent or extensive staining on a fabric that is washable in very hot water, boil the item in a pan containing 5 tablespoons of cream of tartar to every 1.1 litre/2 pints/4ó cups of water, then rinse.

27. For stains on fabrics that can be washed in hot water, pour 240ml/8fl oz/1 cup of lemon juice into the washing machine during the wash cycle.

28. An alternative method is to dampen the stain and sprinkle it with cream of tartar. Carefully hold the stained area in the steam from a boiling kettle, then rinse well with water.

29. To remove rust spots or mildew stains on washable clothing, sprinkle the area generously with salt, then squeeze fresh lemon juice over it. Leave the item for several hours, ideally in direct sunlight. Keep the stain moist by applying more lemon juice as necessary. Brush off the salt and then launder as usual. (Be warned – putting household bleach on rust spots will set the stain.)

30. Sprinkle lemon juice over berry stains on clothing or other fabric, to help them fade.

31. To remove stains from plastic food-storage containers, just mix 1 tablespoon of bicarbonate of soda (baking soda) with a few drops of fresh lemon juice to form a paste, then rub this over the stains.

32. To clean stains on Formica worktops leave fresh lemon juice for 45 minutes. Then sprinkle with bicarbonate of soda (baking soda), scrub gently and rinse.

Using lemon to deal with insects

33. If kitchen or other cupboards are infested with insects, wipe them with lemon essential oil on a cloth. Its limonene is toxic to insects but not to humans.

34. Use a rotten lemon to repel ants.

35. To repel clothes moths, put strips of dried lemon peel into a little muslin bag and place in cupboards and drawers.

36. Deter insects from coming into your kitchen by sprinkling lemon juice around door thresholds and on windowsills, as its scent will deter the entry of insects.


Can a fasting diet help you lose weight? Here are some success stories

can a fasting diet help you lose weight

For anyone considering doing an intermittent diet, there is one crucial question: can fasting help me lose weight? Scientists have confirmed that fasting accelerates fat loss and shifts weight from stubborn areas, but many of us are looking for real life success stories.

Karen, Juli and Sinead all lead different lifestyles and follow different diet plans, but all have the same aim – to lose weight! That’s why, for the last 6 weeks, they have been following Amanda Hamilton’s Eat, Fast, Slim diet plans.

In 6 weeks they lost an average of 5.6kg,which works out as 5.8cm (2.3in) from their waist – that’s a whole dress or trouser size!

Here’s how they did it using the plans in Eat, Fast, Slim:
 
Aim: Fitting weight-loss around a busy schedule

Name Juli Glasgow
Age 24
Height 1.5m (5ft)
Weight before 76.5kg (12st 2lb)
Weight after 70.2kg (11st 2lb)
Lost 6.3kg (14lb)

Juli had an ambitious weight-loss goal – aiming to lose more than 19kg (3st) overall – and wanted a weight-loss plan that would fit her busy working life.

Juli followed Amanda’s 5/2 fasting diet, which meant that she ate a balanced menu five days a week, including three meals and up to two snacks. On the other two days, she was restricted to a small evening meal, averaging around 500 calories. This meant that she could structure her fasting pattern around the days when she’d be busiest at work – it’s often easier to skip meals when you’re busy, and it takes away the temptation to run for the vending machine rather than sit down to a proper meal.

With Amanada’s plan, Juli could have one day off a week, usually at the weekend, when she didn’t strictly follow the menu. It was this flexibility that most appealed to Juli. “I find it so rewarding to have snacks off-plan on one day, and find it much easier to get back on plan 100 percent after. Everything is structured, and on a working day it’s so easy to follow,” says Juli.

Despite these planned “lapses” through weekend socializing, Juli also lost weight steadily and was a third of the way toward her ultimate goal by the end of the six weeks. Not only that, more of the weight went from around her tummy than her upper body. Her waistline shrank by an amazing 7.6cm (3in) during the trial!
 
Aim: To shift those stubborn kilos!

Name Karen McKay
Age 38
Height 1.8m (5ft 3in)
Weight before 67.5kg (10st 10lb)
Weight after 62.1kg (9st 12lb)
Lost 5.4kg (12lb)

Self-confessed “huge eater” Karen weighed 67.5kg (10st 10lb) at start of the 6 week trial. She had been dieting for two months, with some good weight loss, but she was still 6.3kg (1st) away from her ultimate goal. What’s worse is that her weight had reached a plateau.

Karen continued to eat the healthy dishes that Amanda had advised her to follow on her diet, but switched from five small meals a day to 16/8 fasting diet, in which she fasted from 8pm in the evening until 12pm the next day. This meant skipping breakfast and her usual morning snack, then having an early lunch and a more substantial afternoon snack than usual. She slipped up a few times over the six weeks, even giving in to the temptation of some chocolate Easter eggs, but she still overcame the weight-loss plateau and lost a steady 900g (2lb) a week!

“For me this diet has been totally life-changing. Before, it was all about white bread, eating on the hop and huge portions. I’ve had a couple of blips along the way but I’ve totally changed the way I eat. The most incredible thing is that I’ve even managed to get into a size 10! I couldn’t even get into a size 14 after Christmas. I still can’t quite believe it. But this is me now – I’m determined and, as long as the kids keep me running around after them the whole time, hopefully I can stay this way,” enthuses Karen.

Karen noticed that her appetite tends to fluctuate alongside her monthly cycle, which explains why fasting may work slightly differently for men and women. As a result, Karen continued following the 16/8 fasting pattern after the 6 week trial ended, but began eating breakfast every day during the final week of her cycle to help satisfy cravings.

Six months later, Karen is still maintaining her weight loss.
 
Aim: Losing weight when exercise is impossible

Name Sinead O’Neill
Age 40
Height 1.6m (5ft 4½in)
Weight before 68.5kg (10st 13lb)
Weight after 63kg (10st)
Lost 5.85kg (13lb)
Like Karen, Sinead had already lost almost 6.3kg (1st) when she began the trial. She was feeling very motivated to reach her goal weight – another 6.3kg (1st) away – in time for her 40th birthday, and was keen to avoid a weight-loss plateau. A fractured foot meant Sinead was unable to exercise, so the intermittent fasting plan appealed to her as an alternative way to accelerate weight loss.
“I found it really easy – I did six days of no breakfast, but incorporated the same number of calories into the rest of the day’s food and it really worked. I got to my goal weight by my birthday and was delighted to get into a size 12 dress (my husband’s reaction was incredible!) and I’ve also worn leggings again, which I never thought I would. The plan has given me incredible confidence and I have so much more energy now,” says Sinead.

Sinead soon recovered from her broken foot, and started back at her exercise classes with a new-found confidence.
 

Read how Amanda Hamilton lost weight through fasting, and why it’s the prefect bikini diet for you!

Does fasting help you lose weight?Amanda Hamilton has helped thousands of people lose weight and gain body confidence, and she’s distilled this experience into Eat, Fast, Slim. Try Amanda’s healthy plans with more than 100 nutritious recipes. Choose a plan to suit your lifestyle and maximize the benefits of fasting – lose weight, slow down ageing and boost your health.

Buy the book now with free UK postage!

The eBook is now only £4.99


Sous-vide Cooking at Home – a Michelin Masterclass with Daniel Galmiche

learn-sous-vide-cooking-with-daniel-galmiche

Michelin-starred chef Daniel Galmiche shows you how easy it is to cook sous-vide at home. It’s simple and fun do to – which is what his new book Revolutionary French Cooking is all about!


daniel_galmiche-author-of-French-Brasserie-Cookbook‘I am sure everyone is familiar with using sous-vide – a vacuum – as a way of storing food, as we see vacuum-packed food all over the place, from spices and coffee to cured meats and rice. But, although it has been around for a while now and is used a lot in professional kitchens, you may not be so familiar with cooking sous-vide.

In sous-vide cooking, you lock ingredients in a parcel and then steam or boil it at a consistent temperature. The food cooks in its own juices, delivering an incredible flavour and wonderful texture. That’s why it’s so popular in the world’s best restaurants.

But you don’t need fancy vacuum machines or Michelin stars to replicate this professional technique at home – I’ve worked hard to make sous-vide as simple as possible! All you need is a few sheets of cling-film, and you’ll be able to create some really impressive dishes.


Why cook sous-vide?

But first, what are the advantages of cooking sous-vide? Well, to start with, you can prepare dishes one or two days ahead and keep them refrigerated, or portioned up and frozen ready to cook when you need them. Imagine how useful that would be when you have a party coming up and you can spread the preparations so you have less to do on the day.

Then there’s the fact that, when prepared this way, the food develops some beautiful flavours as it cooks in its own juices, with all the flavours locked in. As nothing is lost, there’s an intensity of flavour in the finished dish.

Then we come to temperature, which is critical in sous-vide cooking. When you cook sous-vide, you can cook at a low temperature, around 70°C/158°F. This is important because meat, in particular, can be adversely affected when cooked at very high temperatures as the collagen fibres within the meat can become tough. This is less important with fish but it can still happen. So to keep the meat tender, it is recommended that you cook at less than 70°C/158°F. This makes this style of cooking perfect for the cheaper cuts of meat. You’ll be sure to get perfectly tender results every time.

How to do sous-vide cooking at home

How can you try out sous-vide cooking at home without a professional vacuum-packing machine? It’s actually very simple – all you need is some cling-film!

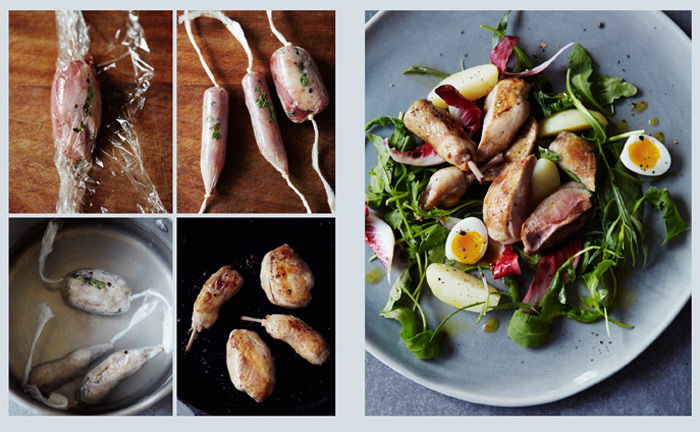
This is a very versatile technique which features a lot in my book Revolutionary French Cooking, and I’ve made it as simple as possible so you can recreate it at home. Here I will show you how to cook a chicken breast, and you can use the same procedure for other foods. The pictures are taken from my sous-vide quail salad recipe, but it should give you some idea of how easy it is to do at home.

how-to-cook-sous-vide-at-home-step-1

1. Put four layers of cling film on your work surface. Make sure you use cling-film and not ‘food wrap’ which won’t be able to stand the cooking temperatures. Put a boneless chicken breast in the centre of the cling film, then roll it tightly in the cling film, pressing out the air to each side as you roll. Make a knot in one end, then press the air out the other side before you knot that end. This will give you a partial sous-vide.

For most sous-vide dishes, there are two alternative cooking methods, boiling and steaming.

how-to-cook-sous-vide-at-home-step-2

2. To boil, place the parcel in a saucepan large enough to hold it comfortably, then just cover it with water. Put the pan on a medium heat and bring the water up to 70°C/158°F. Keep it at that temperature for the time indicated in the recipe, as that will depend on the size of the portion. A 180g/6¼oz chicken breast will take about 20 minutes; if it is stuffed, it will take a further 5–10 minutes.

3. Alternatively, you can steam the parcel. Put a large saucepan of water on to simmer, with a steamer insert on top. Put the chicken in the steamer, cover and cook for 20–25 minutes.

cooking-sous-vide-at-home-step-3

4. When the food is ready, just cut off one end of the cling film, push the meat through and pat it dry on kitchen paper or a clean tea towel. Then, to regain the crisp skin, just heat a non-stick frying pan over a medium heat and pan-fry the chicken, skin-side down, for a minute or so until crisp and browned. Then serve it with a lovely sauce, or jus.

Of course, you cannot keep the product as though it had been properly vacuum-packed because you have not created a full vacuum. Therefore you need to treat the parcel as you would any non-vacuumed product and store it properly in the fridge or freezer for the recommended time only, and do not cook it in advance. If you follow your common sense, then you’ll be fine.

Since some meats have a stronger texture, I usually wrap them in cling film in the same way but cook them as a confit, in hot fat. This method is suitable for chicken leg meat, or the dark meat from poultry or game birds.


sous-vide-cooking-at-home-with-daniel-galmiche

Et voilà , sous-vide quail salad. A dish worthy of your favourite restaurant, and made in your kitchen!


Why would you prepare food this way?

What are the advantages of cooking sous-vide? Well, to start with, you can prepare dishes one or two days ahead and keep them refrigerated, or portioned up and frozen ready to cook when you need them. Imagine how useful that would be when you have a party coming up and you can spread the preparations so you have less to do on the day.

Then there’s the fact that, when prepared this way, the food develops some beautiful flavours as it cooks in its own juices, with all the flavours locked in. As nothing is lost, there’s an intensity of flavour in the finished dish.

Then we come to temperature, which is critical in sous-vide cooking. When you cook sous-vide, you can cook at a low temperature, around 70°C/158°F. This is important because meat, in particular, can be adversely affected when cooked at very high temperatures as the collagen fibres within the meat can become tough. This is less important with fish but it can still happen. So to keep the meat tender, it is recommended that you cook at less than 70°C/158°F. This makes this style of cooking perfect for the cheaper cuts of meat. You’ll be sure to get perfectly tender results every time.

Now you understand the technique of sous-vide cooking, I hope you’ll try some of the recipes found in my book, Revolutionary French Cooking, such as Sous-Vide Little Gems with Ewes’ Cheese; Pork Loin with Mushrooms, Figs and Chestnuts; Salmon in Cabbage Leaves with Lemon Butter Sauce; or Pancetta-Wrapped Monkfish with Carrot and Mandarin Purée.’


heston-blumenthal-foreword-to-Revolutionary-French-Cooking

Discover how you can master contemporary French cooking at home with three simple words: liberté, égalité, fraternité.


How to prepare lemongrass (and a Vietnamese Chilli Chicken recipe)

vietnamese chicken with chilli and lemongrass recipe
Spice expert John Gregory-Smith shows you how to prepare and use lemongrass at home. Then you can use your new found skills to create John’s vibrant Vietnamese Chicken with Chili and Lemongrass recipe, with an exciting yet harmonious blend of spices.

A passion for spices
John-Gregory-Smith---Mighty-Spice-Cookbook‘Spices are my favourite things: I love talking about them, cooking with them and eating them. I have always been passionate about them, and have spent the last 10 years travelling all over the world to learn everything I can about all the different types. Spices have been used in kitchens for thousands of years, and they are as relevant today as they have always been. They have an amazing history; America was even discovered because of them! My Mighty Spice Cookbook is an introduction to cooking with the spices I love so much, to show you how easy and delicious they are to use.’

Cooking with lemongrass

Lemongrass, as its name suggests, has a delicious, earthy lemony flavour, and is native to India and Sri Lanka. This citrusy spice goes hand in hand with coconut milk and is used to flavour all sorts of curries, soups, stir-frys, marinades and even teas and desserts all over Asia. The strongly scented oil is used as a mosquito repellent and a natural preservative, which is so effective that it’s even put on ancient papyrus manuscripts to help preserve them for generations to come.

A perennial grass, lemongrass grows in thick clumps with a fat stalk and a tall wispy top. All the flavour is in the stalk, so you want to look for lovely fat, pale-coloured stalks of lemongrass and avoid anything that looks tired and shrivelled. The fresh lemongrass will keep its flavour for a couple of weeks in the refrigerator.

You can buy lemongrass fresh, dried (which needs to be soaked for a few hours before being used), powdered and in brine (which is very soft so you can just chop it up as desired). However, I have to say, for me, the point of lemongrass is the wonderful fresh flavour it gives, and I feel that only the fresh version delivers this.

How to prepare lemongrass
Lemongrass is a tough spice that you need to prepare properly so you don’t get any woody shards in your delicious meal. The first way to prepare your lemongrass is to simply bash the fat ends of the stalks with a spoon, add the stalks to whatever you’re making and then fish them out before serving. This way you get all the flavour and none of the texture.

The second way is to remove the really tough outer leaves and cut off the tip at the fat end. Then, starting at the fat end, finely slice the lemongrass into rings. You will see a purple band in the rings as you slice; once these stop discard the rest, as it will be too tough to eat. Finely chop the sliced rings or, alternatively, use a mini food processor to chop them up. This method is perfect for stir-frys, curry pastes and salad dressings.

vietnamese chicken with chilli and lemongrass recipe

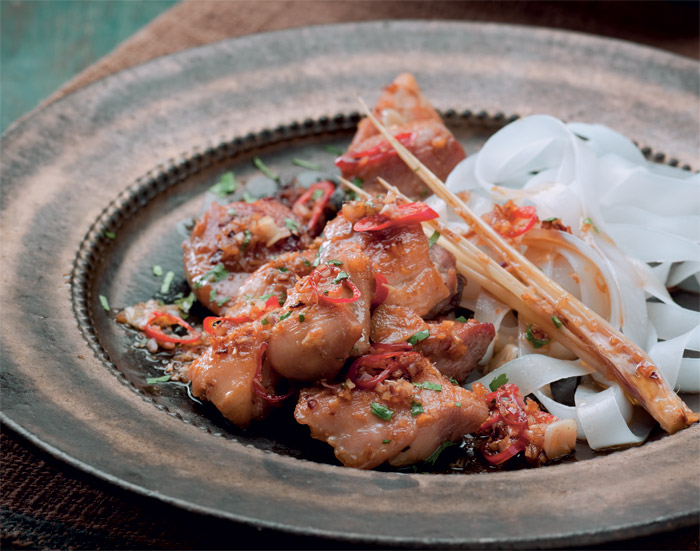
Vietnamese Chicken with Chilli and Lemongrass

Serves: 4

6 lemongrass stalks, plus extra stalks to serve
2 tbsp vegetable oil
4 garlic cloves, finely chopped
1 red chilli, deseeded and finely chopped
500g/1lb 2oz boneless, skinless chicken thighs, cut into bite-sized pieces
2 tbsp fish sauce
1 tbsp soy sauce
a pinch of sugar
1 handful coriander leaves, roughly chopped
rice noodles, to serve

1. To prepare the lemongrass, remove the really tough outer leaves and cut off the ends of the stalks. Starting at the fatter end, roughly slice each lemongrass stalk into rings. You should see a purple band in the rings. Stop slicing when there are no more purple bands and discard the rest of the lemongrass, as it will be too tough to eat. Give the lemongrass slices a quick blast in a mini food processor until they are very finely chopped.

2. Heat a wok over a high heat and add the oil. Once the oil is smoking, chuck in the lemongrass, garlic and red chilli and stir-fry for 10 seconds, or until fragrant. Add the chicken and then stir-fry for 3–4 minutes, or until the chicken is golden and cooked through.

3. Tip in the fish sauce, soy sauce and sugar and stir-fry for another 30 seconds, then chuck in the chopped coriander. Serve immediately with rice noodles and the extra lemongrass stalks.

Fast, fresh and vibrant dishes using no more than 5 spices for each recipeSpicing up you bookshelf the Mighty Spice Cookbook will take you on a culinary journey across the globe – with 100 inspiring recipes from the Far East, North Africa and Central America.

Mighty Spice Cookbook gives you fast and vibrant dishes with no more than 5 spices for each recipe.

Discover how John redefines cooking with spices


9 gadgets you need in your raw food kitchen

gadgets for a raw food dietChristine Bailey from The Raw Food Diet

When many people think of a raw food diet, they just think of salads. And while there’s nothing wrong with salads (and some can be very inventive) a raw food diet can be so much more! Juices, soups, cheeses even quiches can be made raw – all you need is a little bit of know how and the right equipment.

A raw food diet does not have to mean expensive equipment and gadgets. You can start with just a few basic items and gradually build up according to the type of recipes you like to eat. Here are a few key items that will make your life easier and simpler, saving you time in the kitchen and giving you the tools to try some inspiring raw food recipes.

Unsure about a raw food diet? Discover the amazing health benefits of a raw food diet can help you lose weight and feel great at the same time!

 
1. Food processor Perfect for blending ingredients, as well as chopping, slicing and grating with ease. If you can afford it, choose a robust, durable model with a range of grating and slicing options.
 
2. Blender A blender is perfect for making raw food: pulverizing nuts and seeds and making nut milks, raw cheese, smoothies, soups, dips and sauces with ease. It is also particularly useful for making nut flours, which are often used as the basis of raw crackers, bars and desserts. It is also useful for making instant ice creams and sorbets. If you want to crush ice, too, get a heavy-duty model.
 
3. Juicer A couple of recipes call for juicing fruit and vegetables. Choose a model that is robust enough to juice a range of vegetables, including leafy greens. A masticating juicer is ideal as it can handle a greater range of fruits and vegetables and is efficient at extracting the nutrients.
 
4. Nut milk bag A sturdy, lightweight nylon mesh bag that can be used repeatedly to make nut milk – a key ingredient in many raw food diet recipes. They often have a draw string to get all the juice out of the pulp.
 
5. Dehydrator A dehydrator is used to dry foods at low temperatures (below 47.7°C/ 118°F) whilst preserving the nutrient content and enzymes of the food. These are expensive, but worth the investment if you are planning to include more raw food in your diet long term. They are perfect for creating “cooked-like” dishes, warming foods or making crackers, chips, breads and wraps.
For wet mixtures, such as vegetables coated in a marinade or crackers and breads, you will need to line the shelves before starting dehydrating. Most dehydrators come with specially fitted non-stick lining sheets for this purpose.
 
6. Conventional oven If you do not own a dehydrator, it is still possible to dry out foods, but you need to check the temperature settings of your oven. Set your oven to the lowest setting possible and prop the door open with a wooden spoon, for example. The oven should feel warm, not hot. If it is a fan-assisted oven, there will be more air circulation in the oven, which may speed up dehydration. If it is a conventional oven, you will need to stir or turn over the food every 3–4 hours to ensure it dries evenly. Because a conventional oven may not be as efficient as a dehydrator, you might need to allow more time to dry foods.
 
7. Mini grinder Use a clean coffee grinder to process seeds, nuts, herbs and spices in small batches. This is particularly useful for chia and sesame seeds, which add a wonderful depth of flavour to many raw food dishes.
 
8. Spiralizer This is a simple, inexpensive gadget that creates fine vegetable noodles to make “raw pasta”, so it is a useful gadget if you are planning to include more raw dishes in your diet. It can create a range of different noodle styles, making it ideal for pad thai salads and coleslaws too. Alternatively, you can use the grating or chopping attachment of a food processor, a swivel potato peeler, mandolin or sharp knife.
 
9. Sprouter For only a small outlay you can buy sprouters that are very efficient at producing sprouted seeds and beans, but you can also make use of large jam jars covered with a mesh lid or piece of muslin. Alternatively, you can now buy ready-to-eat sprouted seeds and beans.
 

Looking for a raw food recipe? Try this delicious Raw Pad Thai Recipe for a quick, ludicrously healthy meal!


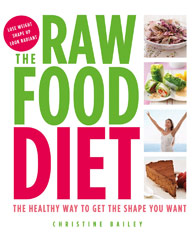
raw-food-dietLooking for a raw food diet plan? Christine Bailey’s The Raw Food Diet shows you how to plan a weekend-long raw food blitz, and week long booster diet, and how to get the benefits of a raw food diet forever in her diet plan for life.

Just as importantly, The Raw Food Diet tells you what to eat, why and when, with a selection of delicious and satisfying recipes.

Find out more and order the book with free UK postage.


Why should you choose fasting as your bikini diet?

Amanda Hamilton explains the benefits of a fasting diet
Nutritionist Amanda Hamilton explains why fasting is an easy, scientifically-proven way of losing weight in just 6 weeks.

What intermittent fasting does to the body is truly extraordinary.

Fasting is undoubtedly an excellent way of shifting the pounds and can help to change your shape. That much we all know. But it also adds years to your life and life to your years. One of the amazing proven side-effects of fasting is that it’s anti-ageing at a cellular level, which is the only place that really counts. This inside-out approach really can help to create a glowing beauty from within.

Fasting is so easy, you really can’t fail. For example, if you follow the 5/2 diet, you can eat normally for five days of the week, then on the remaining two you simply limit your daily calorie intake to 500. There are several fasting techniques to choose from (5/2, 16/8 or alternate day) and, when you have discovered which one suits you best, you can finally give up on the endless hamster wheel of weight loss and gain that sees otherwise sane and successful people becoming slaves to whatever dieting fad happens to be the flavour of the month.
 
Here is why learning to fast was life-changing for me and why you should give it a go:

• Fasting shifted my last annoying 4.5kg (10lb) in weight, without me having to obsess about counting calories or following ridiculous “fad diets”.

• Fasting is good for me on the inside and makes me look better on the outside. When something makes you feel this good, it is easy to stick with it.

• Fasting makes me feel emotionally in control (and a little virtuous).

• Fasting gets my hunger under control.

• Ever since I discovered fasting, according to the most accurate test available my biological age has remained a full decade younger than what it says on my passport, and this is in spite of having given birth to two children. I’m not showing off – it just works!
 
Still unsure about a fasting diet? Read these testimonials from people who’ve lost an average of 5.6kg in just 6 weeks! Is the The Eat, Fast, Slim Diet working for Karen, Juli and Sinead?

Amanda’s bestselling book Eat, Fast, Slim gives you the information and diet plans you need to lose weight and keep it lost. Whether you choose 5/2, 16/8, alternate day or juice diets, this book reveals the science behind their astonishing results – with some delicious recipes to help you achieve it yourself!


Sri Lankan Devilled Pork Shoulder Curry

sri lankan curry recipe

A delicious slow cooked Sri Lankan curry – a perfect Saturday night meal

In this Sri Lankan dish, the meat is slowly cooked in a well-flavoured sauce – the richness and depth of aromas develop and the tender meat melts in your mouth. Serve it with some boiled rice for a fantastic curry.


Devilled Pork Shoulder Curry

Serves: 4-6

Preparation Time: 20 minutes

Cooking Time: 1 hour 25 minutes
 
2 tbsp sunflower oil
2 sprigs curry leaves
2 black cardamom pods
2 cloves
5cm/2in cinnamon stick
1 onion, chopped
2 green chillies, deseeded and halved
4 garlic cloves, finely chopped
2cm/ ¾ in piece of root ginger, peeled and grated
1 tsp chilli powder
1 tsp turmeric
1/2 tsp ground cumin
1 tsp ground coriander
800g/1lb 12oz deboned pork shoulder, trimmed and cut into bite-sized pieces
2 tomatoes, skinned and roughly chopped
3 lemongrass stalks, outer leaves and stalk ends removed and crushed, or 3 pandan leaves, tied into a knot
½ tsp sea salt
1 tbsp lime juice
long grain rice, to serve
 
1. Heat the oil in a large, heavy-based saucepan over a medium-high heat. Add the curry leaves, cardamom pods, cloves and cinnamon stick and sizzle for a few seconds, then add the onion and stir-fry for 2–3 minutes until soft and translucent. Add the chillies, garlic and ginger and stir-fry for 1–2 minutes until fragrant. Add the chilli powder, turmeric, cumin and coriander and stir-fry for 1 minute. Tip in the pork, tomatoes, pandan leaves or lemongrass stalks and salt and toss until the pork is well coated with the spices.

2. Pour in the lime juice and 550ml/19fl oz/scant 2 ¼ cups water, increase the heat to high and bring to the boil. Cover the pan, reduce the heat to low and simmer for 1 hour 15 minutes, or until
the pork is tender and the sauce has thickened, stirring occasionally.

Serve hot with boiled rice.


delicious eastern cooking Winner of the World Gourmand Award for Best Blog Cookbook, Leemei Tan’s debut book offers up vibrant, modern Asian food, with a stunning collection of recipes inspired by China, Thailand, India & Sri Lanka, Vietnam & Cambodia, Japan & Korea, Malaysia & Singapore, the Phillipines, and Indonesia

Order your copy, with free postage in the UK, here


Sea Bass Baked in Sea Salt with a Chicory and Orange Salad

Recipe for sea bass, baked in a salt crust and served with a chicory and orange salad

Bar en croûte de sel avec salade d’endives à l’orange

from Daniel Galmiche’s French Brasserie Cookbook

daniel-galmiche-author-of-revolutionary-french-cookingThis is a typical brasserie dish found all over France and can be made with either sea bass or sea bream. When baking in a sea salt crust, it is always better to cook the whole fish rather than fillets because it makes the flavour so much better. It is slightly less practical because you have to pick out the bones afterwards – but what you lose in convenience you gain in flavour. The combination of the fish with the chicory and citrus salad makes this a light, refreshing dish that zings! And don’t worry about the salt content – it’s just a casing to bring out the flavour.

If you were to wander the coastal cities of France, you would stumble upon brasseries with some spectacular seafood. At the entrance you would probably see display tables of freshly caught fish and shellfish laid out on ice, and inside you might find a tank with live lobsters and crabs, ready to be chosen and cooked à la minute.
 

Sea Bass Baked in Sea Salt

Preparation time: 30 minutes

Cooking time: 15 minutes

2 egg whites
juice and zest of ½ lime
zest of ½ orange
1.8kg/4lb rock sea salt
1 whole sea bass, about 1.3kg/3lb, gutted
olive oil, for drizzling
sea salt and freshly ground black pepper

For the Chicory & Orange Salad

1 orange (ideally a blood orange, if available)
2 heads of yellow chicory
2 heads of purple chicory
½ small handful of dill, roughly chopped
2 tbsp olive oil
½ tbsp reduced balsamic vinegar

Preheat the oven to 190°C/375°F/gas 5. Put the egg whites in a large mixing bowl and whisk until stiff peaks form when the whisk is lifted from the bowl. Add a squeeze of lime juice, the lime and orange zests and the salt and mix by hand, or with a spatula if you prefer. Line a baking tray with greaseproof paper and spoon one-quarter of the salt mixture over it in a layer. Place the sea bass on the salt, then cover it completely with the remaining salt mix, pressing the salt down firmly around the fish.

Bake the fish in the preheated oven for 15 minutes, then remove and leave to rest for 2 minutes without touching the salt crust.

Meanwhile, prepare the salad. Grate the orange zest and set aside, then peel the orange and cut the segments from between the membrane. Do this over a bowl to catch the juices, adding the segments to the bowl.

Cut off the base and outer leaves of the chicory, then cut each head in half, lengthways, and remove the core. Put in a separate bowl. Add the orange zest, dill and oil and mix until combined. Just before serving, add the reduced balsamic vinegar, 2 tablespoons of the reserved orange juice and half the orange segments. (Adding the acidic ingredients at the last minute is essential to keep the salad fresh and crunchy.) Season with pepper and whisk until well combined.

To serve, break the top of the salt crust by knocking it gently with a wooden spoon. Remove the skin from the fish (it may come off with the crust). Lift the top fillet of fish off the bone with a fork and put it on a warm serving plate (one fillet should be enough for 2 people). Remove the bone from the fish, revealing the second fillet underneath, and transfer it to the serving plate. Drizzle with oil and season with salt and pepper. Serve immediately with the salad for a light, fresh and colourful dish.

For more classic French recipes, try Daniel Galmiche’s French Brasserie Cookbook. The book Heston Blumenthal described as ‘full of inspiring recipes that will immediately transport you to a French brasserie in your own home’.

Available with free postage in the UK | £7.99 eBook


4 Ways You Can Help Someone With Depression

4-things-you-can-do-to-help-someone-with-depression

“A friend is someone who understands your past, believes in your future, and accepts you just the way you are.” – Anonymous

Depression expert Alexandra Massey shows you 4 things you can do to help someone you know with depression.
alexandra massey

‘For every one person that suffers from depression, there’s a whole host of family and friends who are also affected. It’s not easy living or working with someone who suffers from depression. It can seem as if they are living in a parallel world because of how they view life which makes no sense to someone who doesn’t suffer. Their lack of motivation, persistent sadness or outbursts can seem very alien to an outsider. Yet, the very nature of depression can make the sufferer too ashamed to talk about what’s really going on and this can make it hard to help. And when they do talk, they often don’t know where or how to get help.

That’s where you come in. For someone who’s depressed, having someone who cares about them is priceless because being caught in the spiral depression can be an isolating and lonely place to be.

Here are 4 ways you can help someone today who suffers from depression.
 

1. Recognise the signs of depression

You probably would know if someone you’re close to is depressed but in case you need some guidance, here are some standard symptoms that indicate depression:

• Persistent sadness, irritability, restlessness, pessimism and hopelessness.
• Feelings of guilt, worthlessness, helplessness.
• Loss of interest or pleasure in hobbies and activities that were once enjoyed.
• Thoughts of death or suicide.
• Chronic physical pain.

As a rule of thumb if these symptoms have persisted for more than 3 weeks, it’s likely that they are depressed. You may want to tell them that you think they’re depressed and even show them this article to explain why you think that. If they brush you off you have a choice: persist or leave them alone. Either way, make it clear that you’re available if they want to talk.
 

2. Help them get help

Being crippled with depression leaves the person feeling very de-motivated and to have someone help them to get professional help can be a life saver. Even if it’s opening the phone book and pointing to the correct number. If the person is suicidal then it’s a doctor they need and it may work best if you offer to take them so instead of saying ‘you need to get to a doctor’ you could re-phrase it with ‘let’s get to a doctor’ and then take them.

You may have to deal with lots of protestations ‘there’s nothing wrong with me’ or ‘just leave me alone’ but this is indicative of very low self esteem and you may have to be gentle but firm to get someone through the door. There’s a line between caring and controlling and it’s important to stay on the caring side. Again, by explaining that you want to help them and that your door is always open, you are being available without nagging them.
 

3. Listen, listen, listen

To really listen to someone is a lot harder than it sounds. So often when we listen we’re not really listening but either planning what we’re going to say once we can get a word in or thinking about something else entirely. Listening to someone who’s hurting is a real skill but also a generous gift. Being properly heard is powerful and healing. It says to the other person ‘I’m interested in you; what you have to say is important to me; I don’t’ judge you – I accept you’.

To really listen to someone you have to become ‘still’. It helps to take your attention from your head and down into your body. This stops your own thoughts from pelting you with questions like ‘Why did he say that? What does that mean?’ Instead you simply listen to every word the depressed person is saying. If your attention is in your body you can more easily ignore the judgements you may have about what they’re saying because they tend to come from your thoughts and, if you’re attention is in your body, you won’t have any thoughts. If you feel judgemental or critical then just keep that to yourself.

What you can do is simply repeat back what the other person has said. For example, ‘So, if I heard you right, you’re feeling like life has no meaning for you at the moment.’ You can even check out whether you were correct, ‘Did I hear that correctly?’ This type of listening is like gold dust to a depressed person. It makes them feel cherished and important. Don’t underestimate how powerful it is. If they don’t want to talk simply sitting with them, being still and peaceful, is also precious and may provide them with the space to be open and honest. Remember one thing, you don’t have to fill the silence.
 

4. Don’t feel guilty about being happy

When you’re concerned that someone you love is suffering it’s important to help but as important to take care of yourself too. It’s hard not to be affected by someone else’s suffering but as far as the sufferer is concerned, if they took others down with them, often it makes them feel worse. Here’s some tips to stay strong:

• Don’t feel guilty for feeling happy
• Find time for you and don’t give up your own pleasures
• Always remember someone else’s depression is not your fault
• They will come through their depression when they’re ready
• Give some of yourself to help them but not all of yourself
• You being happy gives others hope that they can be happy too

It may help to know that there’s always a reason why someone is depressed. Many people I know, myself included, have discovered a better life after recovering from depression. It takes time and slow, slow steps to recover but it is possible. Just know that they will discover real meaning of their life once they’re through it. Be patient but also be happy. Finally, it’s important to remember: you didn’t cause it, you can’t control it and you can’t cure it. There’s only one person who can beat depression and that’s the person who suffers. Just be a friend.

 
Diet can play a big part in helping to alleviate depression – here are Alexandra’s 6 Foods to Help Fight Depression
 
4 things you can do to help someone with depressionIn her latest book, Beat Depression Fast, Alexandra provides a ten-step programme to follow in an easy, straightforward sequence that builds on strengths and skills.

Featuring practical exercises throughout to help put theory into practice, this book will help you make real changes from Day One.

Beat Depression Fast: 10 Steps to a Happier You by Alexandra Massey

£7.99


Master contemporary French cooking at home with Daniel Galmiche

heston-blumenthal-foreword-to-Revolutionary-French-Cooking
daniel_galmiche-author-of-French-Brasserie-CookbookWhen I came to think about a new book, I decided a complete change of perspective was needed. French Brasserie Cookbook was a book focused on my roots in French cooking – looking back to recapture the past traditions of my childhood. But things have changed in cooking in France. My new book, I decided, would have its gaze fixed firmly on the future.

A new kind of French cuisine has emerged over the last few years. People started to ask questions of classic style of French cooking. Did we really need all that cream and those heavy sauces? Why should there be just one right way to make a dish when it could be delicious made in different, often simpler, ways? Why did cooking have to be so time-consuming if quicker techniques gave the same results? Why should cooks feel under pressure to do everything ‘right’ by the book, when cooking was meant to be fun?

My new book Revolutionary French Cooking embraces that revolution, and shows you just how wonderful French food can be when used as a sound and secure foundation on which to build. I have taken the best of French style and given it new twists and innovative touches that rejuvenate and energize this fabulous cuisine.

So what am I trying to achieve in Revolutionary French Cooking? Having established the concept for this new book, it seemed only logical to use the motto of the French Revolution to define its heart: liberté, égalité, fraternité. The three main sections of the book bring a unique slant to modern French cooking. Each original recipe uses an unusual marriage of flavours with unexpected twists and surprises, plus I even let you in on some professional secrets.
 
learn-sous-vide-cooking-with-daniel-galmiche

Sous Vide Quail with a Rocket Salad


Liberté

Classic dishes released from the constraints of traditional French cookery

Liberté showcases recipes that have been released from the shackles of traditional French cooking, replacing complex traditional French techniques with simpler ones and bringing fresh new ideas to the table. One I particularly like is a beautiful pork shoulder steak, a dish that seems so simple but is made sublime with the innovation of fresh cabbage, still crunchy and full of flavour, cooked with fresh chilli and ginger to give it strength, and drizzled with honey to lift the dish.

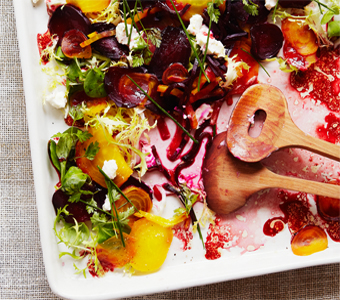
beetroot-carpaccio

Heirloom Beetroot ‘Tagliatelle’ and Carpaccio

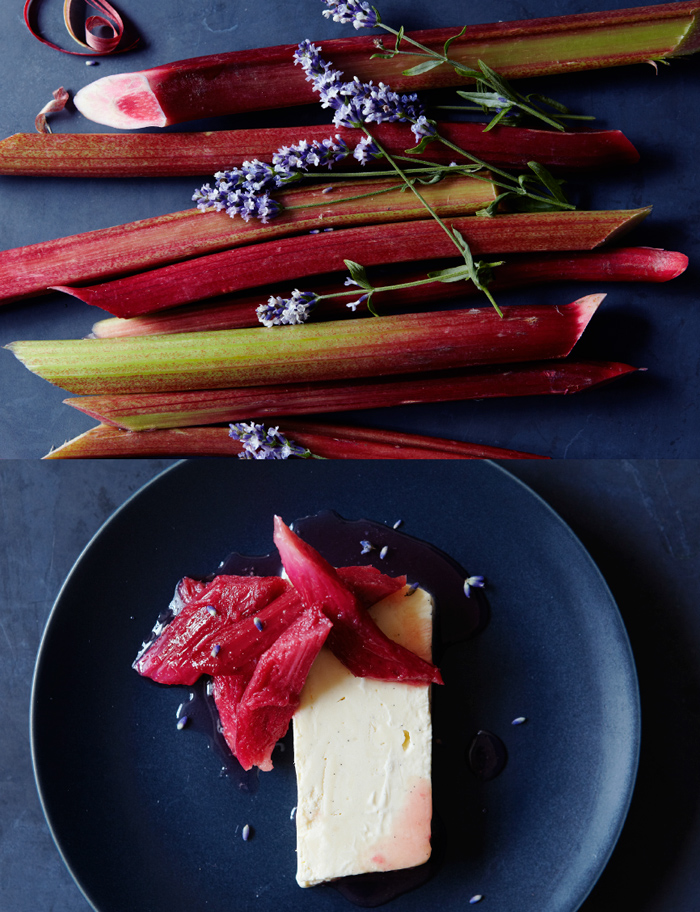
honey-parfait-with-poached-rhubarb

Honey Parfait with Poached Rhubarb

Egalité

Democratic recipes that elevate humble ingredients to starring roles

Egalité brings democracy to the recipes by elevating humble ingredients to take the starring roles. In this section of the book I talk about ingredients that were originally perceived as peasant fodder, but are now being rediscovered and enjoying new recognition. I’m sure you know what I mean by that – ingredients like rabbit, mushrooms, potatoes and simply herbs. The common Jerusalem artichoke become the basis for an imaginative recipe rather than being a scarcely noticed side dish, which is why I created my Jerusalem Artichoke Velouté with Truffle Oil and Chive Cream.

Fraternité

Dishes that bring innovation and style to classic combinations of ingredients

Fraternité celebrates traditional brotherhoods by creating dishes that bring innovation and style to classic combinations of ingredients. My Chocolate, Chilli and Lemongrass Tart recipe beautifully illustrates this section of the book.

In each of these chapters, I have used ideas that we have been developing in our restaurant to make sure they are right up to date. That did raise the issue of whether they were too complicated for home cooks, or perhaps needed professional equipment that home cooks did not have, so I also thought about how easy the food would be to make at home. Recipes that are too daunting to attempt would have no place in my book!

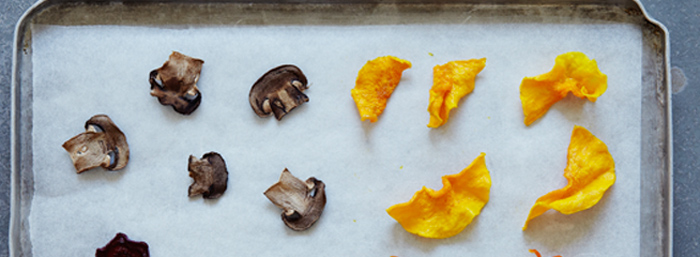
dehydrated-vegetables

Discover how simple it is to dehydrate, smoke and cook sous vide at home with Daniel’s chef secrets

I adapted the techniques to ensure that a competent cook would be able to recreate them without any problems. You won’t need expensive, professional equipment; you will need a reasonably well-equipped kitchen, including a few small tools like a thermometer, a timer, a good blender, a steamer and a wok (we are going to use that for your smoking ingredients – how exciting is that?) but nothing out of the ordinary. Mind you, I do not promise that all the recipes are simple because some are not, but they are all achievable – and they all have a very interesting twist. Just follow the methods carefully and enjoy both cooking and eating the food.

Hopefully you will agree that we have thrown open the door to a whole new range of interesting opportunities for you to expand their repertoire and test your culinary skills. I think you are going to really enjoy cooking the recipes in this book; they are different, entertaining and fun!

Vive la révolution!

Revolutionary-French-Cooking1

Revolutionary French Cooking 

£19.99

Order now with free UK postage 


Bee Pollen Smoothies: Energize, Vitalize and Protect Yourself from Hay Fever

bee-pollen-smoothies

Mango Power Buzz – harness the natural power of bee pollen!

Victoria Beckham is singing the praises of bee pollen for shiny hair, soft skin, and increased energy. If that wasn’t good enough, it also helps protect you from hayfever! Taking bee pollen starting six weeks before hayfever season will get you the full effects. Start today with a delicious bee pollen smoothie from the guys at Crussh, and get the full benefits of bee pollen!
 

Mango Power Buzz

When you need to be full of zing – performing at the top of your form – here’s the juice to give you maximum nutrient power.

150ml/5fl oz/²∕³ cup soya milk
½ banana
125ml/4fl oz/½ cup low-fat yogurt, frozen overnight, or low-fat yogurt plus 4 ice cubes
1 mango, peeled and pitted
50g/1¾oz silken tofu
6 tbsp whey protein powder
1 tsp bee pollen granules

How to do it: Put all the ingredients, including the whey protein powder and bee pollen boosters, in a blender or food processor and blend until smooth and creamy. Serve immediately.

Packed with: vitamins A, B1, B2,B3, B6, C, E, K, folic acid; calcium,potassium
Plenty of: omega-3, selenium
Also contains: magnesium
 

Nature’s MDMA

Rich in vitamins and minerals, bee pollen brings us all the goodness of nature – highly concentrated. It’s super-nourishment in a tiny package.

3 apples, quartered and stems removed
½ banana
125ml/4fl oz/½ cup low-fat yogurt, frozen overnight, or low-fat yogurt plus 4 ice cubes
2 pieces (about 5cm/2in cubes) peeled melon
2 dates, pitted
½ mango, peeled
1 apricot, pitted
1 tsp bee pollen granules

How to do it: Put the apples through an electric juicer. (Alternatively, add 150ml/5fl oz/scant ²⁄³ cup apple juice instead of juicing the apples.) Pour the juice into a blender or food processor, add all the remaining ingredients, including the bee pollen granules booster, and blend until smooth and creamy. Serve immediately.

Packed with: vitamins B1, B2, B3, B5, B6, B7, C, beta-carotene; calcium, copper, magnesium, manganese, phosphate, potassium; fibre; iodine
Plenty of: vitamins B12, E, folic acid; iron, zinc
Also contains: flavonoids
 

Hay Fever Buster

When summer arrives and the pollen is in the air, don’t let it get you down. Enlist the help of the humble bee and some hedgerow favourites. A spoonful of local honey a day will help build up your immunity.

5 oranges, halved
60g/2¼oz/½ cup blackberries
40g/1½oz/¼ cup blackcurrants
1 tsp bee pollen granules
1 squirt of local honey

How to do it: Squeeze the juice from the oranges. (Alternatively, add 150ml/ 5fl oz/scant ²⁄³ cup orange juice instead of squeezing the oranges.) Pour the juice into a blender or food processor, add all the remaining ingredients, including the bee pollen booster, and blend until smooth and creamy. Serve immediately.

Packed with: vitamins B1, B6, C, beta-carotene, folic acid; copper, magnesium, manganese, phosphate, potassium
Plenty of: vitamins B5, E; calcium, iron, zinc
Also contains: vitamins B2, B3, B7; flavonoids, omega-3

Looking for more smoothie recipes? Try this Kale Breakfast Juice recipe for a great tasting way to start the day.

Crussh is the UK’s fastest growing chain of juice bars. Avoiding additives, preservatives, GM foods, salt and sugar, they use the best natural and organic ingredients whenever possible. They have worked hard to perfect their recipes and now, for the first time, they are ready to share them. The book is divided into three chapters – ‘Juices’, ‘Smoothies’ and ‘Boosters’. 


Crussh - juice recipes

“Here they share their secrets for the very first time”

Crussh: Juices, Smoothies and Boosters

176 pages • Illustrated • £14.99

AUS $27.99 NZ $32.00

£7.99 l Buy the e-book now!


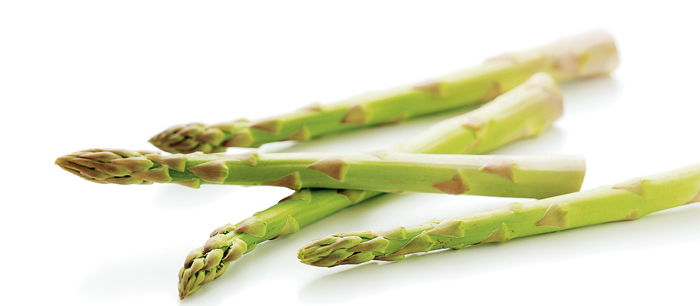
The Amazing Health Benefits of Asparagus

the amazing health benefits of asparagus
 
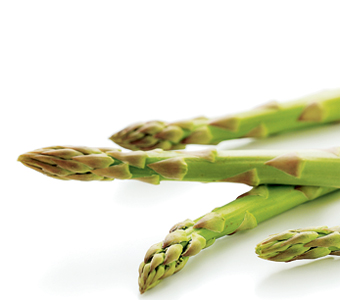
Aspragus is now in season, which means you can enjoy the amazing health benefits of this wonderful spring vegetable. With its vitamins and nutrients, asparagus is good for all parts of the body, from the skin to the bones. Just take a look at what it can offer you, and we’ve included three recipes to help you get inspired.

The information below is from Natural Wonderfoods – a bible of ingredients to optimize your health and vitality!
 
What vitamins and minerals are in asparagus?

Vitamins A, B1, B3, B5, C, E, K, beta-carotene, biotin, folic acid; calcium, copper, iron, magnesium, manganese, phosphorus, potassium, selenium, zinc; asparagin; glutathione; flavonoids; fibre; protein
 
What is asparagus good for?

In mythology, asparagus has been renowned since ancient times both as an aphrodisiac and medicinally, for its healing properties. High in nutrients, low in calories and rich in flavour, asparagus has a wealth of health-enhancing benefits to offer.

Eating asparagus is said to give a natural high. The spears not only taste delicious but also supply numerous minerals and vitamins, including many of the B-vitamins, which play a central role in supporting brain function and the nervous system. If any of these are in short supply, you may be tired, depressed, anxious or constantly on edge. This can happen quite easily if you’re not eating a wide range of healthy foods. B-vitamins work best together, rather than individually, keeping energy levels high and supporting mental and emotional health.

Asparagus is a natural diuretic, encouraging the body to flush out toxins. With its active compound asparagin stimulating the kidneys, bladder and liver, asparagus is a powerful detoxifier. Its cleansing, anti-inflammatory properties make it useful for easing indigestion, irritable bowel syndrome and rheumatoid arthritis. It is also rich in the flavonoid rutin, which we need to maintain a healthy circulation.

According to folklore, asparagus is considered to be a tonic for the reproductive system. It is a fantastic source of folic acid, which is believed to prevent damage to the arteries that supply blood to the heart and the brain. Folic acid has also demonstrated powerful anti-carcinogenic properties and is said to prevent birth defects. An average portion of asparagus provides two-thirds of the daily amount of folic acid recommended for most people.

Asparagus is a rich source of beta-carotene, vitamin C and the antioxidant glutathione, which all lower the risk of heart disease and cancer. The vegetable is also high in antioxidant vitamin E, which fights wrinkles and premature aging, protects the heart and keeps the brain young.
 
Asparagus Recipes
 

ASPARAGUS WITH HONEY AND GARLIC

450g/1lb asparagus spears, trimmed
1 tsp mustard
2 tbsp clear honey
2  garlic cloves,  crushed
½ tsp chopped thyme

Steam the asparagus for 5 minutes until just tender. Drain and put on a plate. Mix together the mustard, honey, garlic and thyme, and pour over the asparagus. Serve immediately.


BALSAMIC ROASTED ASPARAGUS

500g/1lb 2oz large asparagus spears, trimmed
2 tbsp extra virgin olive oil
salt and freshly ground pepper
2 tbsp balsamic vinegar
grated lemon zest, to garnish

Preheat the oven to 400˚F/200˚C/gas mark 6. Coat the asparagus spears in the olive oil and season with salt and pepper. Roast on foil on a baking tray for 20–25 minutes, turning them 2–3 times. Drizzle with balsamic vinegar. Garnish with lemon zest.


ASPARAGUS TINCTURE
for inflammatory conditions

10 young asparagus spears, trimmed
500ml /17fl oz/2 cups vodka

Chop the asparagus and place in a glass jar. Cover in vodka and seal the jar tightly. Stand in a dark, cool place for 10 days, then discard the asparagus. Take 8–10 drops with 1 tablespoon of water three times a day, as needed.


Last month’s In Season vegetable was spring greens – Easter Egg Pies are an unusual (and delicious) way to get them into your diet.


Home