Giveaway Time!


French Brasserie Cookbook just landed on our shelves and we are giving away 5 copies!
The competition runs until Thursday July 2 and the winners will be randomly selected.
Follow

French Brasserie Cookbook just landed on our shelves and we are giving away 5 copies!
The competition runs until Thursday July 2 and the winners will be randomly selected.
Follow
This article is an extract from Mighty Spice Cookbook by John Gregory-Smith.
Also called ‘Indian Saffron’, turmeric is a very old spice that is native to India, which is still the major producer of the spice today.
It was first cultivated around 3,000bc by the Harappan civilization in the Indus Valley. The beautiful spice was used in cosmetics, cooking, medicine and as a dye, which all still remains the case today. The wonderful root has been praised in Ayurvedic medicine for centuries as an important anti-inflammatory, antioxidant and vital aid to digestion. And as I discovered during my recent travels to India, often when turmeric is added to a curry, ‘for health’ is pronounced.
Turmeric is part of the ginger family, and if I am going to get technical, like ginger, it is a rhizome: a horizontal mass of the stem of a plant that is found growing underground.
However, the best thing about turmeric is its madly orange colour. If you are ever lucky enough to get hold of the fresh ‘root’, you’re in for a treat. The muddy yellow-coloured root, when broken open, reveals an intensely deep, bright orange-coloured root. It’s so amazing! In South East Asia the root is often used fresh, either grated or simply cut up and pickled. The flavour is very distinct – earthy and slightly bitter – and it provides the colour of a beautiful, deep orange evening sunshine to curries, stir-frys and curry powders. To make the yellow turmeric powder we all know, the root is boiled, dried and ground.
Due to the intensity of colour and flavour, turmeric should be used sparingly. I tend to buy it in small amounts, which can be kept for up to six months. To keep its flavour, store this golden spice in a dry, airtight container out of direct sunlight. If you are using turmeric in a spice rub, I strongly recommend putting on a pair of rubber gloves before you start.
Cha Ca La Vong
Vietnamese Turmeric and Chilli Spiced Cod with Rice Noodles, Peanuts and Herbs
Cha Ca La Vong is a famous restaurant in Hanoi that serves just one dish: ‘Cha Ca’ or fried fish. It is served with spring onions at your table in a frying pan, sizzling on top of a small barbecue.
Ingredients: 50g/1¾oz/1/3 cup unsalted peanuts, chopped • 250g/9oz rice noodles • 6 tbsp vegetable oil • 1 handful dill, chopped • 1 handful coriander leaves, chopped • 1 handful mint leaves, chopped • 1 tbsp turmeric • 4 tbsp plain flour • 4 cod fillets, about 200g/7oz each, skinned and cut into bite-sized pieces • 8–10 spring onions, halved and finely sliced lengthways • 2 tbsp fish sauce juice of ½ lime • ½ red chilli, deseeded and finely chopped.

1 Heat a frying pan over a medium heat. Add the peanuts and gently toast, shaking the pan occasionally, for 2–3 minutes, or until the peanuts are a beautiful golden brown. Transfer the nuts to a plate to cool.
2 Cook the noodles according to the packet instructions, drain and immediately refresh under cold water. Drain well then transfer to a bowl, dress with 2 tablespoons of the oil to stop them sticking and set aside. Put the dill, coriander and mint together into one bowl and the peanuts into another.
3 In a large mixing bowl mix together the turmeric and flour. Dip the cod pieces into the flour, making sure every piece is completely coated.
4 Heat the remaining oil in a large frying pan over a medium heat and fry the cod, turning occassionally, for 2–3 minutes, or until the flesh turns opaque and is flaky to the touch.
5 Add the spring onions, fish sauce and lime juice and gently mix until well combined.
6 Scatter the red chilli over the top and serve with the noodles, herbs and peanuts on the side to mix together as you like.

John Gregory-Smith
Mighty Spice Cookbook
£14.99
Sign up for our newsletter to get our new articles straight to your inbox every month.
by Christine Bailey
Choosing your juices
The Juice for Life programme means including a freshly made juice or smoothie every day.
Try to make sure that over the course of every week, you drink juices in a rainbow of colours. You might enjoy the red or orange juices best, but make sure you get in a good few green juices, too, as these support your liver’s cleansing work (which helps fight cellulite and fat). If you have specific health goals, feel free to include juices from the Beauty, Power and Immunity chapters, too.
Getting started
Here you can find three recipes to get started. Don’t forget to incorporate a cleansing treatment every other week (or more often if you can manage it), to give a boost to your efforts, and incorporate a regular exercise routine, too. Twice a week, do 30 minutes’ resistance or weight training; and three or four times a week, do 30 minutes’ cardiovascular exercise that makes you slightly breathless.
Creamy Cacao Nut Shake
This indulgent-tasting smoothie bursts with nutrients to keep you energized throughout the day and makes a perfect replacement for breakfast. The nuts give the shake a high protein content, which balances your blood-sugar levels, keeping your mind alert and in focus.
Ingredients: 200ml/7fl oz/scant 1 cup almond milk • 1 tbsp raw cacao nibs or powder • ½ small banana, peeled • ½ tsp vanilla extract • 1 tsp agave nectar • a pinch cinnamon, to serve
Process all the ingredients in a blender until smooth and creamy. Serve sprinkled with the cinnamon.
Health Benefits
Raw cacao is unprocessed and unheated, and so contains far more antioxidants than processed cocoa, and more than even most fruits and vegetables. It is particularly rich in magnesium (which you need for muscle function and relaxation) and arginine, an amino acid that helps maintain muscle mass. It is also packed with the amino acids tryptophan and phenylethylamine, which can boost mood.
Nutritional analysis per serving: Calories 181kcal • Protein 3.8g • Carbohydrates 28g [of which sugars 11.6g] • Fat 9.2g
Goji Burst
This juice is the perfect combination of quick energy fix and long-lasting power drink. A creamy, dairy-free smoothie, it is packed with antioxidants, B-vitamins and plenty of protein to combat fatigue. Serve it as a quick breakfast shake or a mid-morning snack.
Ingredients: 15g/½oz dried goji berries • 1 orange, peeled • ½ sharon fruit • ½ tbsp almonds • 40g/1½oz raspberries • ½ small banana
Soak the goji berries in 170ml/5½fl oz/²/3 cup water for 15 minutes. Juice the orange. Put the juice and the remaining ingredients, including the soaking liquid, into a blender and process until smooth.
Health Benefits
Goji berries contain all the essential amino acids (those we have to derive from food), as well as numerous trace minerals, including zinc, iron, calcium and selenium for immune health and energy production. Weight for weight, they have more beta-carotene than carrots.
Nutritional analysis per serving: Calories 210kcal • Protein 6.3g • Carbohydrates 41.6g [of which sugars 25.2g] • Fat 4.6g
Green Tea Cocktail
Powerfully cleansing and protective, this juice will fire up your body for the day and speed up its elimination of toxins. Drinking green tea has been shown to stimulate metabolism and your body’s ability to burn fat – this means that less fat is stored around your midriff. It is delicious drunk warm or cold.
Ingredients: 3 apples • 1 lemon, peeled • 1cm/½in ginger root, peeled • 150ml/5fl oz/scant ²⁄³ cup green tea, warm or cooled
Juice the apples, lemon and ginger. Stir the juice into the green tea.
Health Benefits
Green tea contains health-boosting antioxidants, including flavonoids and catechins, which can help support heart health and may protect against cancer. Its tannin content is good for digestive complaints, while the theanine in green tea can help alleviate stress and improve mental alertness. The ginger in this juice aids circulation and digestive health.
Nutritional analysis per serving: Calories 101kcal • Protein 1.3g • Carbohydrates 24.7g [of which sugars 23.5g] • Fat 0.3g

Christine Bailey
The Juice Diet
£10.99
Sign up for our newsletter to get our new articles straight to your inbox every month.
Nick Moyle and Richard Hood both grew up during the UK home-brew boom of the 1970s and 80s, with parents who regularly made their own drinks from home-grown produce, enlisting their help. This fired up a life-long obsession for the art of brewing and in 2008 they built their own cider press and have been producing cider for local pubs, beer festivals and deserving friends ever since. They started their Two Thirsty Gardeners website in 2012, which inspires thousands of loyal followers.
Can you describe your book in few words? What should the reader expect from it?
A huge range of easy to make booze recipes.
The reader should expect inspiration and advice on how to turn every day ingredients into tasty alcoholic drinks – from quality beers, ciders and wines to curious international concoctions and crafty cocktails.
When did your passion for brewing begin?
We both grew up in the 1970s when the last home brew boom was taking place and became mesmerised by the steady trickle of gas bubbling through an airlock, knowing that one day demijohns full of murky liquid would eventually be transformed into bright, clear drinks. We both moved to Bath, surrounded by Somerset apples, so it wasn’t long before we were dusting down our parents demijohns and filling them with pressed apple juice to turn into cider.
How did you meet and how Two Thirsty Gardeners came about?
We met at university in Coventry and, coincidentally, both ended up working in Bath. After making those first batches of cider Rich acquired an allotment so we thought it would be fun to plant our own apple trees and see if we could grow anything else to turn into booze. We then decided to chronicle our digging and swigging adventures on a website.
What was the biggest challenge in writing Brew it Yourself?
Some wines take quite a while to be ready, and are based on seasonal ingredients, so we had to try out lots of recipes each season and weren’t able to select the best ones until the following year… so it was quite a while before we knew exactly which recipes would make it into the book. We’re graphic designers by trade so we also designed the book and took all the photographs – deadline was a blur of writing, tasting, designing and taking pictures
What inspires you in what you do?
Rich is quite a perfectionist with his recipes, so has made lots of ciders, trying to get the recipe and combination of apples and other ingredients as perfect as possible. Nick is much more inspired by discovering new drinks and experimentation. I guess that combination works well.
What are some of the perks in your job?
We wish brewing and gardening were full time jobs! At the moment, it’s all done in our spare time – although we’re both self employed so we’re lucky that we can find a bit more spare time than most people. It’s always great when we get to meet experts in one particular craft, from gin makers to brewers and specialist gardeners. Their dedication to their craft inspires us.
What was the first recipe that you mastered?
Cider, although Rich would probably say you never really master cider. One of the first recipes we put on the website, and our most popular, is rhubarb wine. We’re currently growing seven different varieties of rhubarb to see if they produce different results.
What is the best recipe to get started?
Making liqueurs couldn’t be easier – it simply involved dropping some ingredients into a spirit, with sugar, and allowing them to infuse. We’ve also got a really cheap and easy beer recipe for anyone wanting to get started brewing, and the rhubarb wine recipe is a great one for first time wine makers. For something a little different there’s a really refreshing sparkling drink from Mexico called ‘tepache’ that involves quickly fermenting pineapple rind.
What is your typical day like?
Working on the day job, squeezing in recipes and writing whenever we can.
Can you tell us 3 hacks for a successful drinks making?
In Autumn, make a really easy rosehip syrup and plunge it into cocktails or cider; Drop an edible flower – borage being our favourite – into your ice cube tray before freezing; Chuck a liquorice stick into stout while brewing – it’ll give you a even richer, tastier beer.
 Nick Moyle and Richard Hood
Brew It Yourself
ISBN: 9781848992276
Available in July 2015
Sign up for our newsletter to get our new articles straight to your inbox every month.
-by Nick Moyle and Richard Hood
The long, hot days of summer (yes, both of them) are when the garden is usually enjoyed at its best. We like nothing better than lolling around on the lawn after a hard day hoeing with a cool glass of home made beer, cider or fancy cocktail, contemplating what to brew next. Happily there are plenty of potential ingredients ready for picking and turning into booze. Here are five of our favourites…
Mint
Few things say summer more than sticking a sprig of mint into a glass of booze and topping it up with ice. From a white wine spritzer to an ice cold sangria or even a heady, appley cider, a fragrant green leaf or two adds an unmatchable fresh twist to drinks. We, however, like to turn a simple twist into a full on minty boogie, which is why you’ll often see us reaching for the rum to mix up a mint packed mojito. But we don’t stop there. Our home made crème de menthe kicks into touch any bright green supermarket versions you may have encountered, and we even turn great handfuls of the stuff into a fantastically fresh mint wine.
Raspberries
No end of English folk are quick to declare the strawberry summer’s greatest fruit. And while it does a fine job of adding some fruity sophistication to a glass of Pimm’s, it lacks the versatility of our favourite berry, the raspberry. Being popular among the good people of Scotland you won’t be surprised to hear that it makes a fine whisky based liqueur. A vodka spirited raspberry liqueur is almost as impressive and a shot of the vibrant red liquid into a glass of fizzy wine makes a delicious ‘Kir Imperial’ – a redder alternative to posh blackcurrant cocktail Kir Royale. Raspberries are also our favourite fruit to add to beer recipes, with malty ales and crisp wheat beers all getting their berry bonuses.
Flowers
Elderflowers are out en masse as spring gives way to summer, encouraging lots of people to have a go at the only alcoholic fermentation they’ll make all year – a sparkling drink often referred as ‘elderflower champagne’. But there’s no reason to stop there: a similar amount of effort (but longer waiting time) can reward you with a much boozier elderflower wine; or an elderflower liqueur (like St Germain) can be made by soaking the flowers in sweetened vodka. If you’ve already missed elderflower season, fear not, because there are lots more edible summer blooms that can be used for booze. Fancy some floral fizz? Give lavender a go. Want a winning summer wine? Try red clover. Got a penchant for a sweet, peppery aperitif? Then nasturtium liqueur could be right for you.
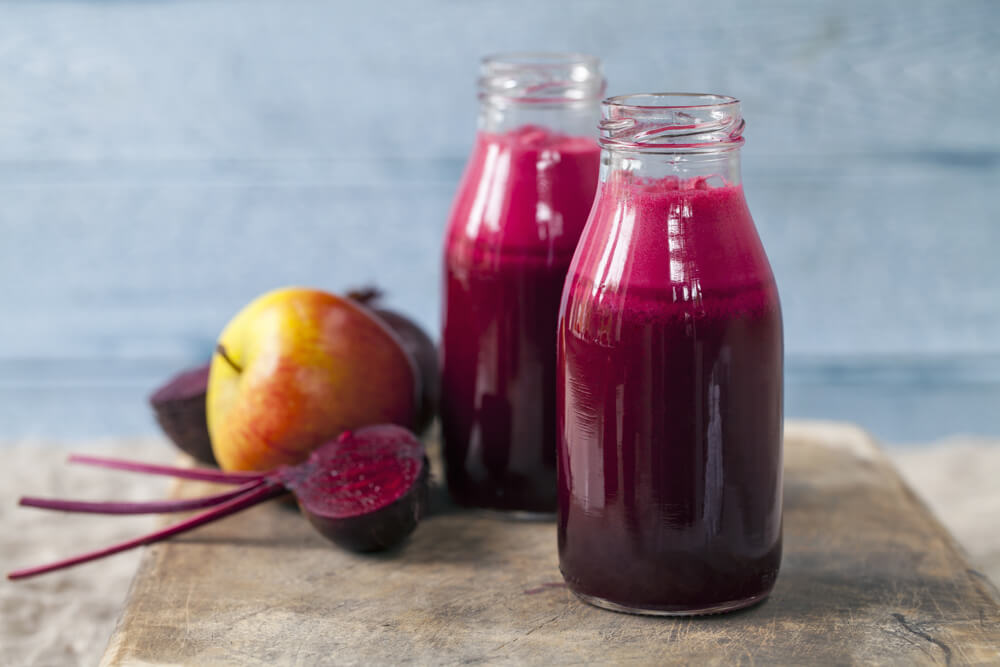
Beetroot
Suggest to wine connoisseurs that you can make a decent bottle of plonk out of muddy root vegetables and they’ll laugh you out of the wine cellar. But, mud aside, there’s a lot to be said for fermenting a rooty harvest – mainly the high sugar content and unique sweet flavours. We have often turned to carrots and parsnips for our demijohn antics, but perhaps the most interesting veg for beginners – on account of its robust, red colouring – is beetroot. Use it as a wine flavour on its own, or tickle it up a notch with a few carefully selected spices, and you’ll not regret it. What’s more, beetroot can also be fermented to make a magnificent Eastern European tipple: kvass. Na zdorovie!
Chillis
You may think the last thing anyone needs during the hottest days of the year is the red raw heat of a freshly picked chilli bombing your glass of cold booze. But it’s time to think again. A blast of chilli flame prior to a cooling sip of cocktail is a marvellous thing – as anyone who has lined a margarita glass with chilli, salt and lime can testify. Another of our favourite summer drinks to get the hot rim treatment is Mexican ‘tepache’ – a quick and easy fermented drink made from pineapple. Bloody Mary fans should try infusing a chilli or two in vodka before plunging it into tomato juice, and anyone having a go at some home made ginger beer might like to follow Rich’s lead: he adds Scotch bonnets to the mix for an extra fearsome fizz.
About the Authors: Nick Moyle and Richard Hood both grew up during the UK home-brew boom of the 1970s and 80s, with parents who regularly made their own drinks from home-grown produce, enlisting their help. This fired up a life-long obsession for the art of brewing and in 2008 they built their own cider press and have been producing cider for local pubs, beer festivals and deserving friends ever since. They started their Two Thirsty Gardeners website in 2012, which inspires thousands of loyal followers.
Nick Moyle and Richard Hood
Brew It Yourself
ISBN: 9781848992276
Available in July 2015
Sign up for our newsletter to get our new articles straight to your inbox every month.
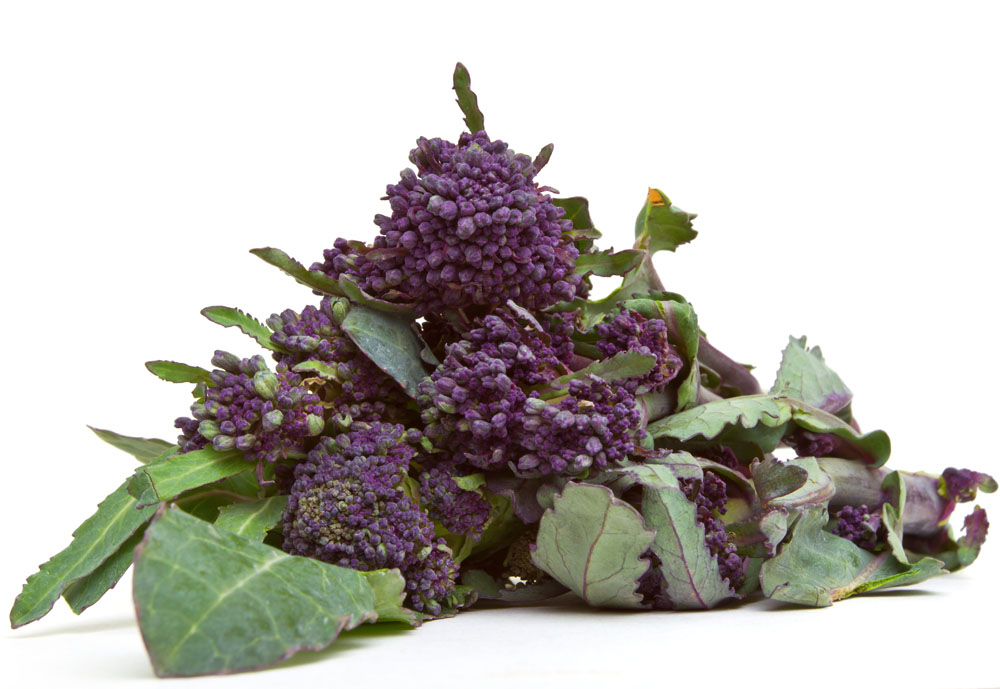
The short season for purple sprouting broccoli begins in the depths of winter and continues through into spring. This highly attractive vegetable offers a wonderful alternative to the more commonly found blue-green calabrese variety of broccoli (and the less common bright green romanesco) that is found during the rest of the year. Purple sprouting broccoli has long, shooting stems with coarse green leaves and a purple tinge to its heads. With a more delicate flavour than the other broccoli, it makes a wonderful treat. Enjoy it lightly steamed until tender and served as an appetizer with hollandaise sauce or melted butter (rather like asparagus) or use it in tarts, gratins, soups, sauces and pasta dishes, as well as in stir-fries and salads. When buying, always choose firm stems with tightly packed heads and really fresh-looking
leaves. Avoid specimens that are wilting, soft or discoloured. Remove the leaves, trim the ends of the stalks and peel away any thick skin, then either steam or boil until it is just tender and still retains its bite and colour. If stir-frying, cut into bite-sized pieces. If a recipe requires only the florets, do not throw away the stems – when cooked, they are tender and juicy and have a marvellous flavour. Use them in another recipe such as a soup or stew.
Broccoli and spring onion salad
Ingredients: 2 bunches spring onions; 2 tbsp olive oil; 1.25kg/2lb 12oz purple sprouting broccoli, trimmed; shavings of Parmesan cheese for sprinkling (optional). For the Dressing: 1⁄2 tsp grated orange rind; 1⁄2 red chilli, seeded and chopped; 2 tbsp orange juice; 1 tsp lemon juice; 2 tbsp olive oil, salt and freshly ground black pepper.
First make the dressing.
Put all the ingredients in a jug, seasoning to taste with salt and pepper, and whisk together. Set aside.
Preheat the grill to hot.
Trim the root and tops of the spring onions and strip off the papery outer skin.
Arrange on a grill pan. Drizzle with the olive oil and season to taste with salt and pepper.
Grill for 3–4 minutes on each side until tender.
Meanwhile, pour about 5cm/2in of water into a wide pan and bring to the boil. Add the broccoli and cook for about 5 minutes, until just tender. Drain well and pat dry.
Divide the broccoli and grilled spring onions between four warm serving plates, drizzle over the dressing and scatter with
Parmesan shavings, if using.
Serve immediately.
Sign up for our newsletter to get our news and updates straight to your inbox every month.

Susannah Blake
SEASONAL FOOD
by Tiff & Jim Easton
The sun is shining and you make a last-minute decision to head off with your tent. With planning time at a minimum, simplicity is key, so what you need are recipes that have a short list of ingredients which you may already have at home, or which are easy to find in a local shop. Even on an impromptu weekend camping trip without much preparation or equipment, there is lots here for children to get involved in and enjoy.
The Essentials – Useful Ingredients to Always Have With You
Ground allspice • chilli sauce • fresh herbs (mint leaves, thyme sprigs, bay leaves or parsley leaves) • olive oil and/or sunflower oil • root ginger• salt and pepper • soy sauce • stock cubes • sugar and/or clear honey • vinaigrette
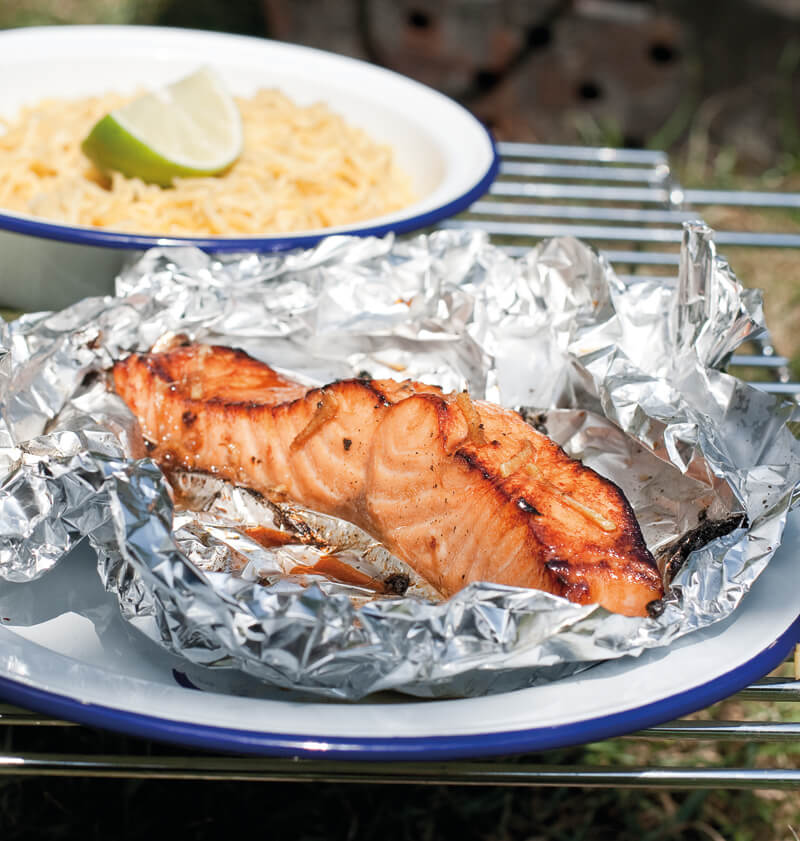
Soy & Ginger Salmon Parcels
We love this served with noodles and Chinese chilli sauce. If you can cook the salmon in the embers of an open fire, you’ll get an added charred dimension.
Preparation time: 10 minutes
Cooking time: about 10 minutes
Ingredients: Salmon steaks or 4 boneless, skinless salmon fillets; 4 tsp suflower oil; 4 tbsp soy sauce, plus extra to serve; 2.5cm/1in piece of root ginger, peeled and finely chopped; 4 pak choi, stems sliced and leaves left whole or 1 broccoli head, cut into florets; cooked noodles or rice, to serve; lime wedges, to serve; chilli sauce, to serve.
1. Cut four rectangles of foil, each large enough to enclose a salmon steak. Scrunch up the edges of each rectangle, then spoon 1 teaspoon of the oil into each one and top with a salmon steak.
2. Sprinkle each salmon steak with 1 tablespoon of the soy sauce and one-quarter of the ginger. Pull up the foil to enclose, tightly sealing the seams of the salmon parcels to prevent them from leaking.
3. Cook over a low heat on a barbecue or in a griddle pan for about 10 minutes until the salmon is opaque and just cooked. For a real taste of the outdoors, cook the parcels in the glowing embers of an open fire. Remember to move the parcels from time to time to allow the salmon steaks to cook evenly.
4. Meanwhile, bring a saucepan of lightly salted water to the boil and add the pak choi. Blanch for about 3–5 minutes until the pak choi is tender but still retains a slight crunch. Unwrap the salmon parcels and serve hot with the blanched pak choi, noodles, lime wedges, soy sauce and chilli sauce.
Cashew Nut Stir-Fry
Stir-fries are always fantastic first-night meals as they are quick and easy to prepare in one pan. This one is no exception. The broccoli in the recipe can be substituted with French beans or any combination of mixed vegetables.
Preparation time: 5 minutes
Cooking time: about 10 minutes
Ingredients: 2 tbsp sunflower oil; 1 broccoli head, cut into small florets; 2 garlic cloves, finely chopped; 5cm/2in piece of root ginger, peeled and finely chopped; 4 spring onions, sliced; 1 tbsp soy sauce, plus extra to taste; 200g/7oz/scant 1¹/³ cups cashew nuts; 450g/1lb fresh noodles; chilli sauce, to serve.
1. Heat the oil in a large frying pan over a high heat. Add the broccoli and stir-fry, stirring frequently, for 1 minute.
2 Add the garlic, ginger, spring onions, soy sauce and 4 tablespoons water and stir-fry for another 3 minutes until the broccoli is just tender, adding a little more water if needed. Add the cashew nuts and stir-fry for another 1 minute.
3 Add the noodles and stir-fry for about 2–3 minutes until the noodles are cooked. Taste and add more soy sauce, if you like. Serve immediately with chilli sauce.
Barbecued Pineapple Wedges
Put this on the barbecue to cook just before you sit down to eat your dinner. The longer it has to cook, the more caramelized your pineapple will become. For an extra dimension, add a splash of rum to the butter.

Preparation time: 15 minutes
Cooking time: about 25 minutes
Ingredients: pineapple; 55g/2oz butter; 2 tbsp sugar, any variety.
1. If using wooden skewers, soak them in cold water for at least 30 minutes before grilling.
2. using a sharp knife, cut the pineapple, including the green top, into quarters lengthways. Cut between the flesh and the skin to release the flesh, but keep the skin in place. Slice the flesh on each pineapple quarter into chunks and push a long skewer lengthways through each wedge and into the skin to hold the flesh in place during cooking.
3. Heat the butter in a saucepan over a low heat until melted. Remove from the heat, add the sugar and mix. Brush the butter mixture over the pineapple quarters.
4. Cook, skin-side down, over a high heat on a barbecue or in a griddle pan for about 20 minutes until golden brown and soft. Serve warm.

Tiff & Jim Easton
Family Camping Cookbook
Available from Nourish Books
£10.99
– by Kirsten Hartvig
Bronchitis is inflammation of the lining of the bronchial tubes in the lungs. The acute form of bronchitis is usually caused by a viral or bacterial infection and often follows a bout of cold or influenza. The symptoms are cough (initially harsh and dry, later with yellow or green sputum), shortness of breath and fever.
Chronic bronchitis causes persistent or recurrent cough and breathing difficulties and is most common in people with lowered immune function, particularly smokers, drug and alcohol abusers, patients taking immuno-suppressive drugs and those suffering immunodeficiency disorders and cancer. Chronic bronchitis goes hand in hand with structural damage within the lungs called emphysema, which decreases the amount of lung tissue available to absorb oxygen and get rid of carbon dioxide and other waste products. The lungs also develop a rough, thickened lining making breathing very difficult.
How to prevent bronchitis?
The most important step you can take to avoid chronic bronchitis is to quit smoking – or not start in the first place!
Keep your weight within optimum limits and eat plenty of foods rich in vitamins A and C, and bioflavonoids and zinc to enhance your immune function. Avoid noxious fumes and immunosuppressive drugs wherever possible, and breathe fresh air every day. Avoid eating dairy products, which encourage the production of excess mucus.
What to do
Drink large amounts of fluid (water, herbal tea, juice, soup), and drink juices rich in vitamin C – the immune system needs a lot of this nutrient when fighting infection. Garlic, onion and leek have natural antibacterial properties and help avoid the development of complications such as pneumonia.
Limit your sugar consumption, particularly added sugar, sweets, fizzy drinks and concentrated fruit juices, and cut out dairy products altogether. Try to avoid suppressing the cough. Herbal expectorants make the cough more ‘productive’ and make it easier to get rid of excess mucus from the airways. Rest is important but avoid lying flat in bed, which may make breathing more difficult and exacerbate the cough. Use extra pillows or a bolster to prop up your head and upper body.
Cough Mixture
1 tsp sweet violet; 1⁄2 tsp borage; 1⁄2 tsp liquorice root; 1⁄2 tsp thyme; 1⁄2 tsp wild marjoram; 200ml boiling water; 1 tsp honey; Squeeze of lemon juice
Place the herbs in a warmed teapot. Add the boiling water, cover and leave to infuse for 10 minutes. Pour into a mug, add honey and lemon juice, and serve.
Inhalation
Add 1 tablespoon each of chamomile, thyme, eucalyptus and wild marjoram to 600ml boiling water and infuse for 5 minutes, covered. Wrap a blanket around you and put a big towel over your head. Take the lid off the infusion and gently inhale the steam for about ten minutes. Splash your face with cool water.
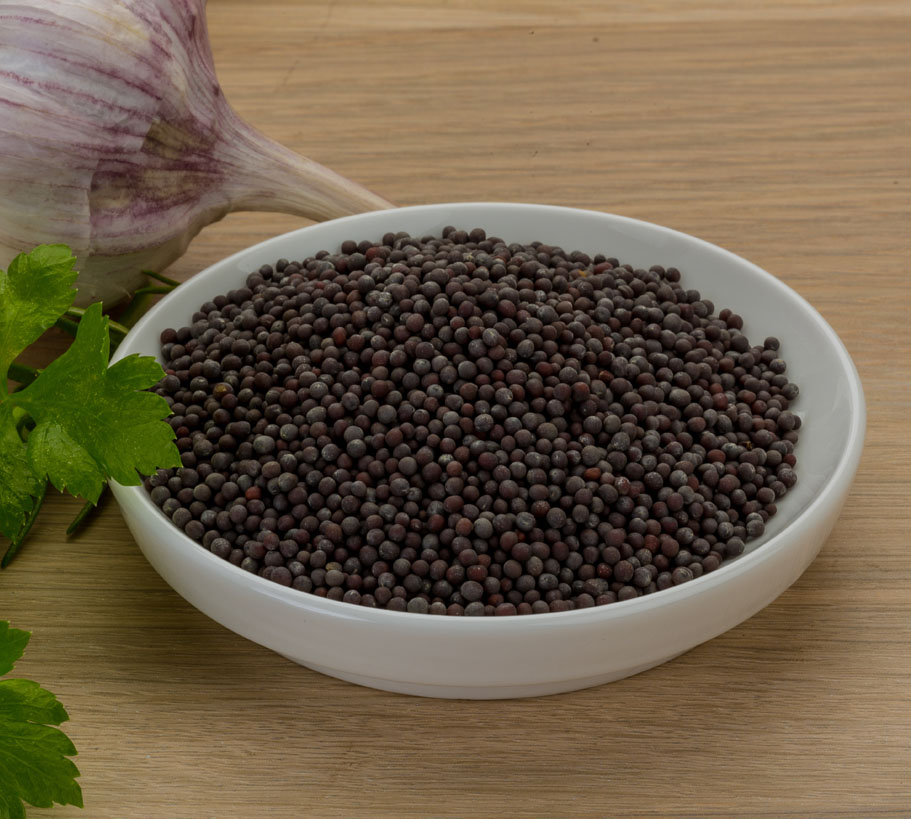
Mustard poultice
Mix 5 teaspoons of crushed black mustard seeds with a large portion of hot oatmeal (porridge). Wrap the mixture in a tea towel and place this on the chest for 20 minutes; make sure it is not so hot as to cause discomfort, and check from time to time that the mustard is not causing skin irritation.

Kirsten Hartvig
Eat to Boost Your Immunity
ISBN: 9781848990029
£12.99
– by Nicola Graimes
Pack of Pasta (and Noodles)
So simple, so versatile, so economical: a pack of pasta is the perfect foundation for many meat-free meals. In this chapter, it’s at the heart of the Linguine Carbonara with Crispy Capers, Tagliatelle with Asparagus and Wild Garlic Pesto, and Creamy Porcini and Sea Beet Orzo. Let’s not forget noodles, either, which are equally diverse. For starters, there’s Wonton Ravioli with Rocket, Pho with Kale Chips, and Burmese Noodle, Tofu and Winter Greens Curry. All completely different dishes, yet with a common theme.
The taste of this pasta dish belies the fact that it’s made from humble, simple ingredients. Even the aubergine skin does not go to waste, as it’s cut into thin strips, fried until crisp and piled on top of the pasta just before serving.
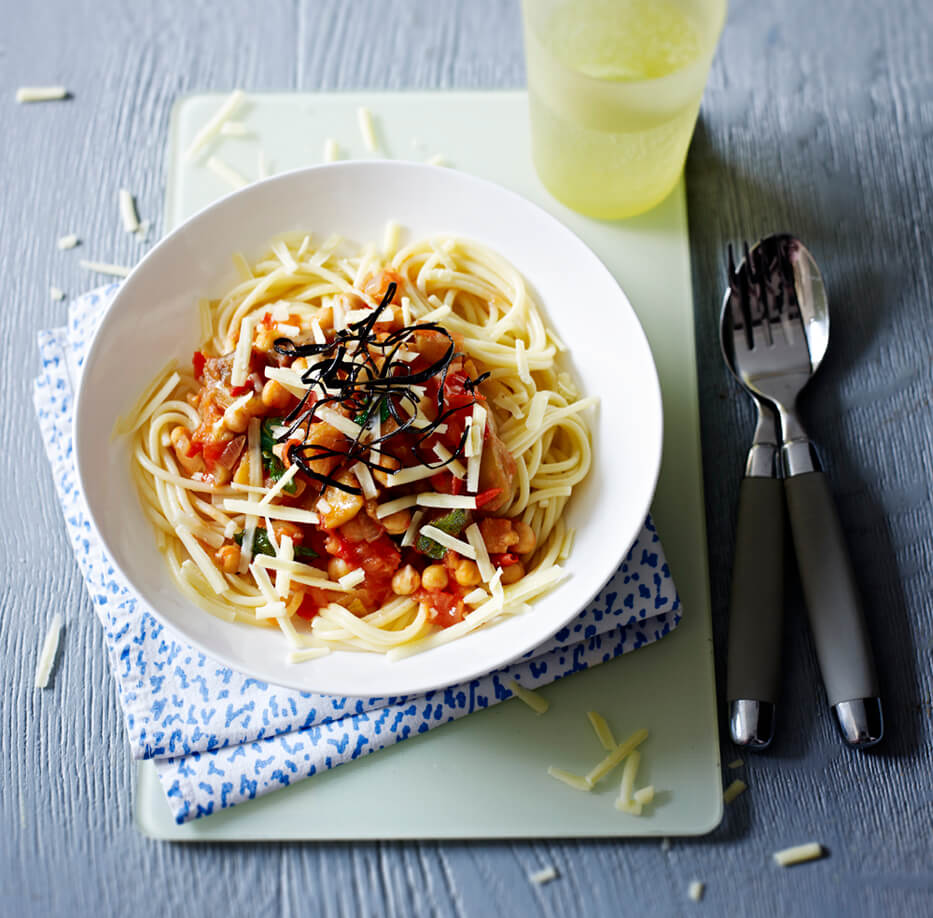
Spaghetti with Aubergine, Cheese and Mint
Ingredients: ; 2 aubergines; 4 tbsp extra virgin olive oil, plus extra for drizzling; 400g/14oz dried spaghetti; 1 onion, finely chopped; 1 garlic clove, finely chopped; 4 tomatoes, deseeded and chopped; 1 tbsp tomato pur.e; 125g/4.oz/1 cup drained tinned chickpeas or cooked dried chickpeas (see pages 8–9); 1 handful of mint leaves; sea salt and freshly ground black pepper; 40g/1.oz mature vegetarian sheep’s cheese, grated, to serve.
Using a vegetable peeler, remove the skin from the aubergines in strips. Cut the skin into thin strips and dice the flesh. Heat the oil in a large, deep frying pan over a medium heat and fry the aubergine skin for 2–3 minutes until crisp, then remove using a slotted spoon and drain on kitchen paper. Add the diced aubergine to the pan and fry for 8 minutes, or until light golden all over.
Meanwhile, bring a large pan of salted water to the boil and cook the spaghetti following the pack instructions. Drain, reserving 6 tablespoons of the cooking water.
Add the onion to the aubergine and cook for another 8 minutes until softened, then add the garlic, tomatoes, tomato purée and chickpeas. Cook over a medium-low heat for 5 minutes, stirring often and adding enough of the reserved pasta cooking water to loosen the mixture and make a sauce.
Just before serving, stir in the mint and season with salt and pepper. Spoon the sauce on top of the pasta, drizzle with a little extra oil and serve with the fried aubergine skin and cheese piled on top.

Nicola Graimes
Veggienomics
Available from Nourish Books
£14.99
– by Nicola Graimes
Roasting intensifies the flavour of nuts (and seeds) as well as giving them more of a crunch. You get a more even roasting and colour if this is done in the oven, rather than in a dry frying pan, but if you only need a small quantity, then pan-toasting makes more sense. If I happen to be using the oven, I make the most of the space and heat by toasting the nuts in bulk; they’ll keep for a week or so in an airtight container.
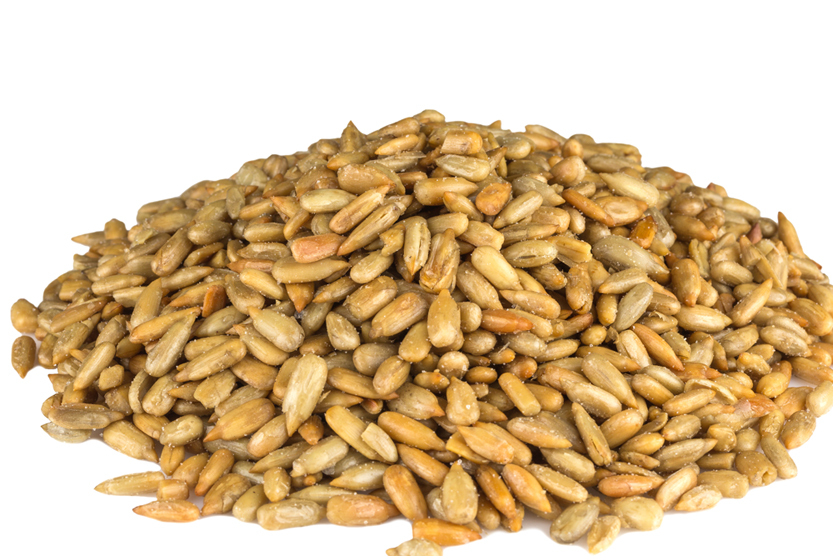
Makes: 2–4 handfuls
Preparation time: 5 minutes
Cooking time: 15 minutes
Ingredients: 2–4 handfuls of shelled nuts (or seeds) of choice
Preheat the oven to 180ÅãC/350ÅãF/Gas 4. Line one or two baking sheets with baking parchment and put the nuts (or seeds) in an even layer on top. Place the sheet(s) in the bottom half of the oven and roast for 12–15 minutes (6–10 minutes for seeds), turning twice, until toasted and evenly browned. Keep an eye on them as they can burn easily. Alternatively, for small quantities of nuts (or seeds), put them in a dry, heavy-based frying pan in an even layer. Toast over a medium-low heat for 8–10 minutes (5–7 minutes for seeds; 2–3 minutes for small seeds such as sesame), regularly shaking the pan, until toasted and evenly browned. Leave to cool and store in an airtight container.
If you regularly eat nuts and seeds it pays to buy them in large quantities. If packed in a plastic bag, transfer them after opening to an airtight container and store in a cool place – even the fridge or freezer – to keep them fresh. You don’ t have to defrost nuts and seeds before use.
Nicola Graimes
Veggienomics
Available from Nourish Books
£14.99
– Extract from The Big Book of Wok By Nicola Graimes
Since stir-fried vegetables are cooked in a matter of minutes, they retain much of their vitamin and mineral content, making it possible to prepare meat-free meals in a wok that are as packed with nutrients as they are appealing to the senses. Asian countries also offer up a treasure trove of vegetarian culinary delights, that are not only quick to prepare but are also highly colourful, rich in flavour and varied in texture, with a deliciously light, fresh quality.
When stir-frying vegetables in a wok, it is important to remember a few rules. Always cut them up into uniformsized pieces, so that they cook evenly. Add denser vegetables, such as carrots and green beans, to the wok first, as they require a longer cooking time than, say, courgettes or beansprouts. And do bear in mind the shape of the vegetable. Cutting long vegetables on the diagonal makes them look more appealing than chunks or slices and creates a bigger surface area, speeding up cooking time.
In addition, a wok can also be used in the same way as the Indian kadahi (a wok-shaped pan with round handles on either side) to create fabulously fragrant curries, such as the ever-popular vegetable kormas and dahls, as well as Thai green and red curries and Malaysian coconut curries.
Half-moon aubergine with chilli & garlic
Preparation Time: 10 minutes, plus 30 minutes standing time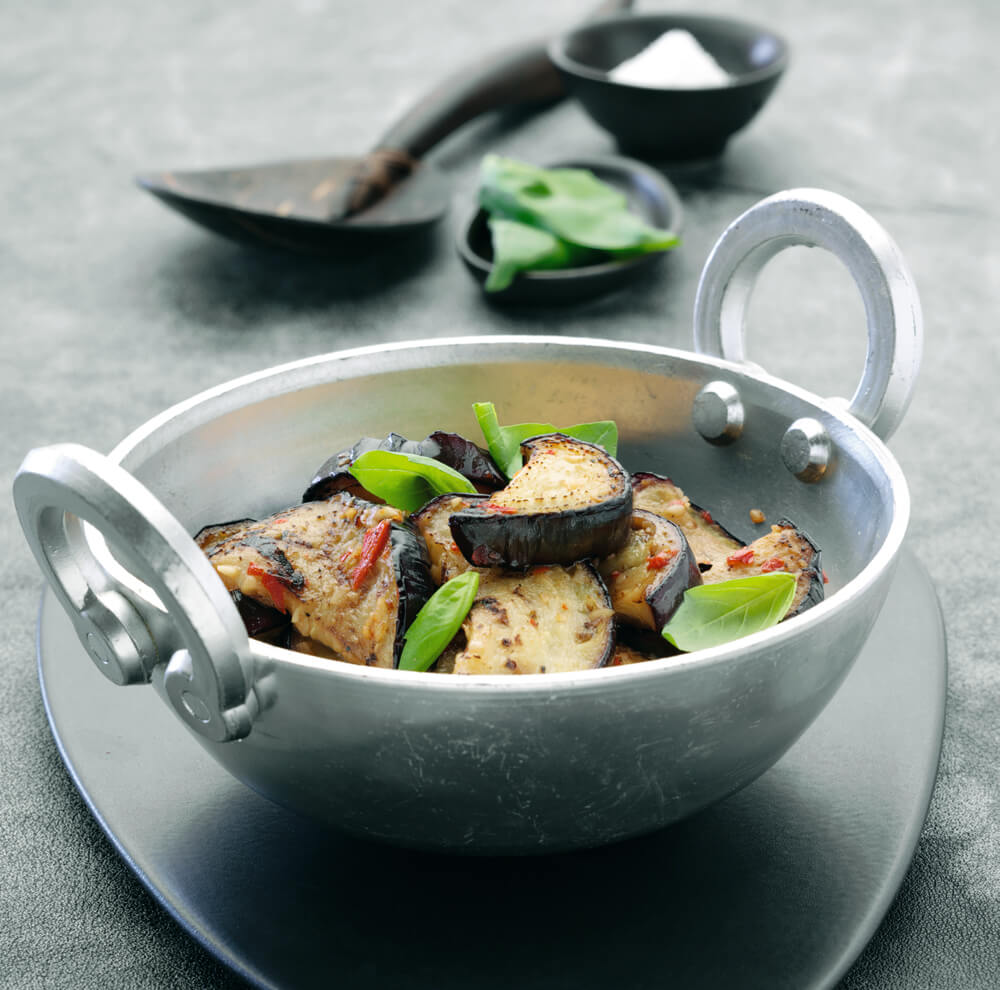
Cooking Time: 15–22 minutes
Ingredients: 2 medium aubergines, sliced into rounds then halved salt and freshly ground black pepper: 4 tbsp sunflower oil; 4 cloves garlic, chopped; 2 red bird’s eye chillies, deseeded and finely chopped juice of 1 lemon; handful of fresh basil leaves, torn
1 Put the aubergine pieces on a plate and sprinkle generously with salt. Cover and set aside for 30 minutes. Rinse well, then pat dry with kitchen paper.
2 Heat a wok until hot. Add the oil, then toss in half of the aubergine and stir-fry it for 7 minutes until lightly browned and tender. Remove from the wok with a slotted spoon and set on one side. Add the remaining aubergine and stir-fry for 7 minutes.
3 Return the first batch of aubergine to the wok, then toss in the garlic and chillies and stir-fry for 30 seconds. Stir in the lemon juice, season to taste with salt and pepper and serve, sprinkled with the torn basil leaves.
Oriental mushrooms in hoisin sauce
Preparation Time: 15 minutes
Cooking Time: 6 minutes
Ingredients: 4 tbsp hoisin sauce; 4 tbsp water; 1 tsp cornflour; 3 tbsp sunflower oil; 2 cloves garlic, chopped; 5cm (2in) piece fresh ginger, peeled and finely chopped; 1 large green pepper, cut into bite-sized pieces; 125g (41⁄2oz) shiitake mushrooms, halved; 125g (41⁄2oz) chestnut mushrooms, halved; 125g (41⁄2oz) oyster mushrooms, halved if large; 100g (31⁄2oz) enoki mushrooms; 3 tbsp Shaoxing wine or whisky; 1 tsp sesame oil
1 Mix together the hoisin sauce, water and cornflour in a small bowl and set on one side.
2 Heat a wok until hot. Add the sunflower oil, then toss in the garlic and ginger and stir-fry them for 30 seconds. Add the green pepper and stir-fry for another minute.
3 Add the shiitake and chestnut mushrooms and stir-fry for 2 minutes, then add the oyster and enoki mushrooms and stir-fry for another minute until tender.
4 Pour in the wine, stir until reduced, then add the hoisin sauce mixture. Cook for a minute over a medium heat or until the mushrooms are glazed, adding more water if the mixture becomes too dry. Stir in the sesame oil and serve immediately.
Sweet & sour vegetables
Preparation Time: 10 minutes
Cooking Time: 5 minutes
Ingredients: 4 tbsp vegetable stock; 1 tbsp Chinese rice vinegar; 1 tbsp caster sugar; 2 tbsp light soy sauce; 2 tbsp groundnut oil; 2 onions, sliced; 12 baby corn; 2 large handfuls of mangetout, trimmed; 115g (4oz) shiitake mushrooms,; thickly sliced; 2 cloves garlic, chopped; 2 pak choi, sliced lengthways; 2 handfuls of beansprouts
1 Mix together the stock, rice vinegar, sugar and soy sauce in a small bowl and set on one side.
2 Heat a wok until hot. Add the oil, then toss in the onions and stir-fry them for 2 minutes. Add the baby corn, mangetout, mushrooms, garlic and pak choi and stir-fry for another minute.
3 Stir in the stock mixture and cook for 1 minute. Toss in the beansprouts and serve immediately.
Grace Cheetham is the author of the internationally acclaimed The Best Gluten‐Free, Wheat‐Free & Dairy‐Free Recipes and  Simply Gluten‐Free & Dairy‐Free. Passionate about great food and allergy‐free living, she runs a website and a blog ‐ www.glutendairyfree.co.uk that has been voted one of the best gluten‐free and allergy‐friendly blogs by Channel4.com’s 4Food and one of the 100 best food blogs by womanandhome.com. Grace judges at the Great Taste Awards and Free‐From Food Awards and runs cookery demonstrations and classes.
Can you describe your book? What should the reader expect from it?
I’m so excited about this book. It’s the culmination of so many years of baking (my basic bread recipe, alone, took about 60 goes to get it absolutely perfect). And it’s jam-packed with treats and indulgences. From an amazing Sourdough Bread to Cinnamon Brioche Buns, from moreish Fennel Crackers to Millionaire’s Shortbread, from delicate Fondant Fancies to Chocolate & Beetroot Cake, from a show-stopper Crab & Dill Tart to Beef Wellington, or from delicious Lemon Tart to Passion Fruit & Coconut Cheesecake, there’s everything and, hopefully, more…
When did your passion for gluten-free cooking begin?
I grew up on free-from food. When I was young, the ingredients that were available were generally very restricted but now there’s such a wonderful array of different ingredients to choose from, and to experiment with. I started with fairly simple recipes but then, as more ingredients came onto the shelves, I tried more and more things. My favourite culinary moment from this book, I think, was when I made the Chocolate Profiteroles. They worked first time – and are heavenly. And you simply can’t tell that they’re gluten-free. It was the first time I’d had profiteroles for many, many years. Bliss!
What was the biggest challenge in writing The Best Gluten-Free and Dairy-Free Baking Recipes?
My biggest challenge, I think, was not eating all the cake! All over the summer months that I wrote the book, I invited friends and neighbours around to taste the bakes. I have a lovely memory of one sunny summer afternoon when we had five families – with all the adults sitting eating cake, cookies and cheesecake and drinking wine – and all the kids running around the garden.
What was the first gluten-free dish that you mastered?
Flourless Chocolate Cake, I think. And it taught me one hugely important lesson – the importance of beating or whisking cake ingredients really, really well, to get as much air as possible into the mixture. It makes all the difference to the end result.
What is the best gluten-free recipe to get started?
Try something that you really love. Maybe pizza or maybe chocolate brownies. Follow the recipe exactly, regardless of things like whether the mixture seems too runny compared to traditional baking. Put it in the oven, sit back and enjoy the anticipation!
What is the kitchen tool that is absolutely necessary for a gluten-free baking?
Probably kitchen scales or proper measuring cups. The balance of flours, in particular, is really important in gluten-free baking.
Can you tell us 3 kitchen hacks for a gluten free diet?
– Make up large batches of flour mixes. In this book, there are different flour mixes for Cakes, Biscuits, Breads and different types of Pastry. Different balances of types of flour plus grain/starch balances make a massive difference to the end result. And instead of making up the mixes every time you bake, it’s good to make up large batches and store them, ready for when you feel like baking.
– Keep your store cupboard and freezer stocked, especially with things like gluten-free breadcrumbs that you can keep in the freezer and use to coat chicken or fish from frozen.
– Share the dishes with your friends and family, rather than cooking/eating separate meals. It’s much more fun!

Grace Cheetham
The Best Gluten-Free and Dairy-Free Baking Recipes
ISBN: 9781848991996
Available from Nourish Books