Tag Archive for: recipes

Summer and salad go hand-in-hand and this offering from Heather Whinney’s Virtually Vegan is a fresh, sweet, figgy take on a summertime staple. Complete with a harissa and mint dressing for an unmatched kick!

Taken from Virtually Vegan by Heather Whinney

Serves 4–6
Prep: 15 mins
Cook: 40 mins

Ingredients
400g/14oz/2 cups dried Puy lentils, rinsed well
a pinch of allspice
2 garlic cloves, grated
about 10 fresh figs
a drizzle of olive oil
200g/7oz coconut pieces
2 celery stalks, trimmed and finely sliced
3 spring onions/scallions, trimmed and finely chopped
1 large handful of land cress or baby spinach leaves
sea salt and freshly ground black pepper
For the dressing
3 tbsp extra virgin olive oil
1 tbsp white wine vinegar
1–2 tsp harissa, plus extra for drizzling
1 handful of mint leaves, finely chopped, plus extra to garnish

Method
1 Put the lentils in a pan of salted water and bring to the boil, then turn the heat down and simmer with the lid partially on for about 40 minutes, or until tender. Drain well and leave to one side.
2 While they are cooking, make the dressing. Put the oil and vinegar in a small bowl or jug, whisk and season with salt and pepper, then stir in the harissa and mint. Pour it over the lentils while they are still warm so they soak up the flavours. Add the allspice and garlic and stir well so all the lentils are coated. Taste and season some more if needed.
3 Preheat the oven to 200°C/400°F/Gas 6.
4 Put the figs in a roasting pan and drizzle over the oil, add the coconut to the pan and roast for about 10–15 minutes until the juices start to just run from the figs and the coconut begins to turn golden. When cool enough to handle, slice the coconut pieces into shards and roughly chop the figs or quarter them. Leave to one side.
5 When the lentils are cool, stir in the celery, spring onions/ scallions and cress or spinach leaves, then add the figs and half the coconut and stir gently. Transfer to a serving bowl, scatter over the remaining coconut shards and mint leaves and drizzle with a little extra harissa oil from the jar to serve.

For non-vegans…
The Moroccan flavours of this salad work well with lamb kebabs, particularly for a barbecue. Alternatively, crumbled feta would make a tasty topping.

Don’t forget to tag us – @nourishbooks – in your recreations! Happy cooking!

We’re gearing up for the publication of French Countryside Cooking by Daniel Galmiche, coming your way on May 14th (pre-order your copy right here)! To celebrate, we’re sharing an *EXCLUSIVE* recipe with you, get ready to dig into Daniel’s Smoked Chicken, Courgette, Garlic & Rosemary Casserole.

Taken from French Countryside Cooking


SERVES 4
PREPARATION TIME 10 minutes, plus making the stock
COOKING TIME 50 minutes

Ingredients
100g/3½oz/½ cup basmati rice
2 tbsp green tea
2 tsp caster (superfine) sugar
4 chicken legs, with thighs and drumsticks separated
20g/¾oz unsalted butter
2 tbsp sunflower oil
2 tbsp olive oil
400g/14oz courgettes (zucchini), cut in half lengthways, then cut into 2.5cm/1in pieces
12 garlic cloves, unpeeled
4 tbsp sherry vinegar
500ml/17fl oz/2 cups Chicken Stock
1 rosemary sprig
1 tsp chopped rosemary leaves
sea salt and freshly ground black pepper

Method
1 Put a large piece of kitchen foil, shiny-side down, in the bottom of a steamer, then put the rice, tea and sugar on the foil, cover with a steamer insert and lid and put over a medium heat for about 5 minutes until the mixture starts smoking. Quickly lift the lid and put all the chicken inside. Put the lid back on, turn the heat down to low and smoke for 5 minutes. Lift out the chicken and put on a plate to rest, wrapping the smoking ingredients in the foil and discarding them as quickly as you can.
2 Season the chicken with salt and pepper. Put a flameproof casserole dish over a medium-high heat. Add the butter and sunflower oil and when the butter is foaming, add the chicken, skin-side down, and cook for 6–8 minutes until golden brown all over, turning occasionally. Remove from the pan and put in a bowl, cover with cling film (plastic wrap) and leave to rest.
3 Discard the oil from the casserole dish and wipe the excess away with paper towel, taking care not to disturb the sediment. Return the dish to a medium-low heat, add the olive oil, courgettes (zucchini) and garlic and cook for 4–5 minutes until coloured and just tender.
4 Move the courgettes (zucchini) to the sides of the pan and put the chicken pieces in the centre to reheat. Turn the heat up to medium and when you can actually hear the food starting to cook, add the sherry vinegar straight away; it should evaporate immediately. Quickly pour the stock over the top and throw in the rosemary sprig. When the stock comes to a simmer, gently wriggle the pan around a little so that nothing is stuck to the bottom, then put the lid on top without closing it completely – you just want a little gap so that condensation doesn’t create too much liquid, but not too large so that the liquid evaporates. Cook for 15 minutes.
5 Remove the lid and discard the rosemary. Turn the heat to high and cook for a further 5 minutes, stirring to remove any caramelized bits stuck to the bottom, until the sauce is shiny and just thick enough to coat the back of the spoon. Add the chopped rosemary leaves and season with salt and pepper to taste, then serve hot.

Happy cooking! Don’t forget to tag us in any of your creations, @NourishBooks.


The #midweekmeal veggie burger recipe you’ve been after! Taken from The Part-Time Vegetarian by Nicola Graimes, this plant-based burger takes less than 45 minutes to prep and cook, it’s full of flavour and a firm family favourite. Read on for the full recipe!

Taken from The Part-Time Vegetarian by Nicola Graimes

Serves: 4
Preparation time:  15 minutes
Cooking time: 30 minutes

Ingredients
90g/31⁄4oz/generous 1⁄2 cup red quinoa
400g/14oz can borlotti beans, drained
2 spring onions/scallions, finely chopped
5 sun-dried tomatoes, finely chopped
1⁄2 red pepper, deseeded and diced
1 tsp hot smoked paprika
1 tbsp soy sauce
2 tsp dried oregano flour, for dusting
sunflower oil, for frying
sea salt and freshly ground black pepper
rocket/arugula, watercress and spinach
salad, to serve

To finish
3 tbsp sweet chilli sauce
3 tbsp mayonnaise
4 ciabatta rolls or sesame seed buns,
split in half and lightly toasted
3 tomatoes, sliced into rounds
2 handfuls of salad leaves
1 avocado, peeled, pitted and diced

Method
1
Put the quinoa in a saucepan, cover with water and bring to the boil over a high heat. Turn the heat down and simmer for 20 minutes, covered, until very tender (it should be softer in texture than normal), then drain.
2
Meanwhile, mix together the sweet chilli sauce and mayonnaise.
3
Tip the cooked quinoa into a food processor with the borlotti beans and process to a coarse paste, leaving some of the beans almost whole. Spoon the mixture into a bowl and stir in the spring onions/scallions, sun-dried tomatoes, red pepper, smoked paprika, soy sauce and oregano. Season with salt and pepper to taste.
4
Quarter the mixture and shape each portion into a large burger with floured hands, then lightly dust each burger in flour. Heat enough oil to coat the base of a large non-stick frying pan over a medium heat and fry the burgers for 6–8 minutes, turning once, until golden and crisp. (Alternatively, brush with oil and cook on a baking sheet in the oven preheated to 190°C/375°F/Gas 5 for 25 minutes, turning once, until golden and crisp.)
5
To serve, spread each half of the toasted ciabatta rolls with the sweet chilli mayonnaise. Top one half of each roll with the tomato, salad leaves, burger and avocado and then the ciabatta lid. Serve with salad.

Happy cooking! Don’t forget to tag @NourishBooks when you post your creations online.

There’s not much that can’t be fixed by a generous helping noodles, except maybe a snappy recipe to match. Chilli, garlic and a whole lot of seasonal veg makes this vegan dish ideal for a punchy midweek meal, perfect for a Tuesday night! Taken from Rose Elliot’s Complete Vegan, you can use straight-to-wok noodles or dried ones, remember to follow the instructions on the packet.

From Rose: ‘Meg is my middle daughter, a busy doctor and mother of three, and this is one of her fast after-work recipes. Meg uses ready-to-use or ‘straight-to-wok’ noodles; if you prefer to use dried ones, prepare according to the packet instructions.’

Taken from Rose Elliot’s Complete Vegan


Serves 2–3

Ingredients
2 tbsp olive oil
1 onion, chopped
125g (41/2oz) slim broccoli stalks
3 garlic cloves, grated or crushed
1 red chilli, finely chopped
3cm (1in) piece of fresh root ginger, grated
1 red (bell) pepper, deseeded and thinly sliced
125g (41/2oz) button mushrooms
125g (41/2oz) sugar snap peas
125g (41/2oz) baby sweetcorn, sliced lengthways
300g (101/2oz) straight-to-wok noodles
soy sauce, to taste
handful of fresh coriander (cilantro) leaves, chopped, to garnish
roasted cashew nuts, to serve

Heat the oil in a wok or large saucepan over a medium-high heat, add the onion and cook, stirring, for 3–5 minutes until starting to soften. Add the broccoli along with a splash of cold water, cover the pan and increase the heat to high. Steam the broccoli for 5 minutes, until the stems begin to soften and the water has evaporated.

Add the garlic, chilli, ginger, (bell) pepper, mushrooms, sugar snap peas and sweetcorn, and cook for 1–2 minutes until the vegetables are cooked. Stir in the noodles and warm over a low heat until the noodles are heated through. Add soy sauce, to taste.

3 Serve, garnished with the chopped coriander (cilantro) and roasted cashew nuts.

Happy cooking! Don’t forget to tag @NourishBooks in your social posts, we’d love to see your creations!

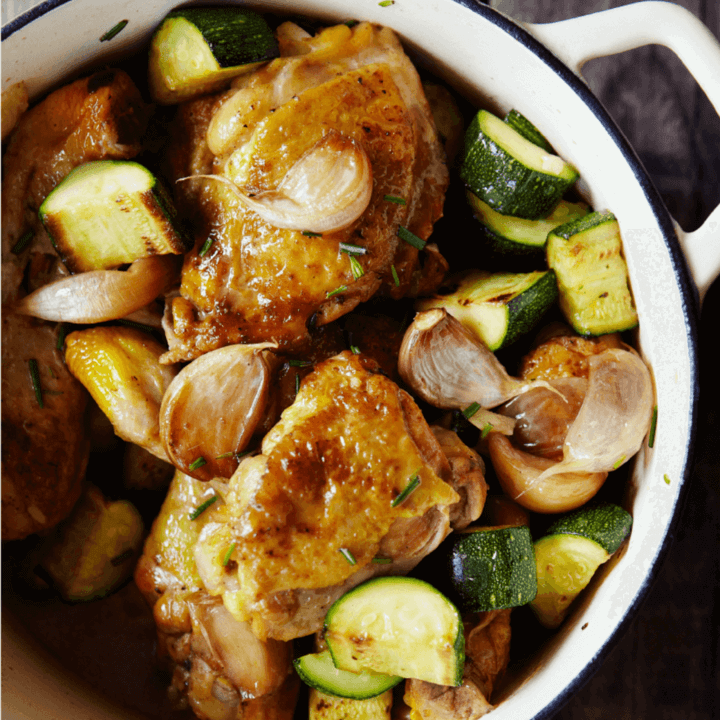
We can’t quite contain our excitement for French Countryside Cooking by Daniel Galmiche, published on May 11th! So, to tickle your tastebuds, we’re sharing an *EXCLUSIVE* recipe from the book: Raspberry Tart with Creme Patisserie & Rosemary. Daniel’s book works in time with the seasons, in an effort to be more sustainable and also fill your shopping lists with ingredients at their peak.

From Daniel: ‘ I have included a few recipes with raspberries in this chapter, and with herbs too, but I can assure you they are totally different. Here, for example, the touch of grated lime, the crème fraîche and the rosemary bring a unique balance to the dessert with its crunchy Breton sablé pastry.’

Taken from French Countryside Cooking


SERVES 4
PREPARATION TIME 25 minutes, plus 20 minutes infusing
COOKING TIME 30 minutes

Ingredients
300g/10½oz/heaped 2⅓ cups raspberries
icing (confectioners’) sugar, to decorate
grated zest of ½ lime
1 tsp chopped rosemary leaves
2 tbsp crème fraîche

FOR THE SABLÉ PASTRY
90g/3¼oz/¾ cup plain (all purpose) flour
1 tsp baking powder
70g/2½oz/heaped ½ cup icing (confectioners’) sugar
60g/2.oz unsalted butter, softened
a pinch of salt
2 egg yolks
grated zest of ½ lime

FOR THE CRÈME PÂTISSIÈRE
250ml/9fl oz/1 cup full-fat milk
½ vanilla pod, split lengthways
3 egg yolks
50g/1¾oz/scant ¼ cup caster (superfine) sugar
25g/1oz/scant ¼ cup cornflour (corn starch)
1 tbsp unsalted butter
juice of ½ lime

Method
1 Preheat the oven to 170°C/325°C/gas 3. To make the sablé pastry, sift together the flour and baking powder in a bowl. Whisk together the sugar, butter, salt and egg yolks, using an electric whisk, until light and flu!y. Fold in the flour mixture and lime zest to make a soft dough. Flatten between two sheets of baking paper to about 1cm/½in thick, then transfer to a baking sheet, lifting off the top sheet of baking paper. Bake for 12–18 minutes until light golden. Remove from the oven and cut immediately into an 18cm/7in square while it is still soft and pliable, but then leave it to cool before lifting o! the tray.

2 To make the crème pâtissière, put the milk in a saucepan over a low heat. Use a sharp knife to scrape the vanilla seeds into the milk, whisk the milk, then add the vanilla pod as well. Heat the milk until it is almost simmering, then remove from the heat, cover with cling film (plastic wrap) and leave to infuse for about 20 minutes. Remove the vanilla pod from the milk, rinse and dry on paper towel as you can use it again.

3 Meanwhile, whisk the egg yolks and sugar until light, thick and creamy. Gradually add the cornflour (corn starch), a spoonful at a time, whisking well after each addition to avoid any lumps forming. Slowly pour half the infused milk into the egg mixture, beating as you pour, then transfer the mixture back into the saucepan with the remaining milk. Put over a medium-low heat and stir continuously and quickly for about 10 minutes, or until the mixture begins to thicken. Remove from the heat, whisk in the butter and lime juice and continue to stir until the mixture has cooled down and is lovely and smooth, thick and slightly trembling.

4 Spread the crème pâtissière about 5mm/¼in thick over the pastry, leaving a small margin clear around the edge. Put the raspberries in lines over the top of the crème pâtissière to cover it completely. Dust with a shake of sifted icing (confectioners’) sugar, and sprinkle with the lime zest and a little of the chopped rosemary. Mix the remaining rosemary with the crème fraîche and spoon into a piping bag, then pipe a small dot of crème fraîche on the top of every other raspberry all over the tart. Add a tiny piece of rosemary to each crème fraîche dot.

Happy baking! Don’t forget to tag us, @NourishBooks, on social media – we’d love to see how you get on.

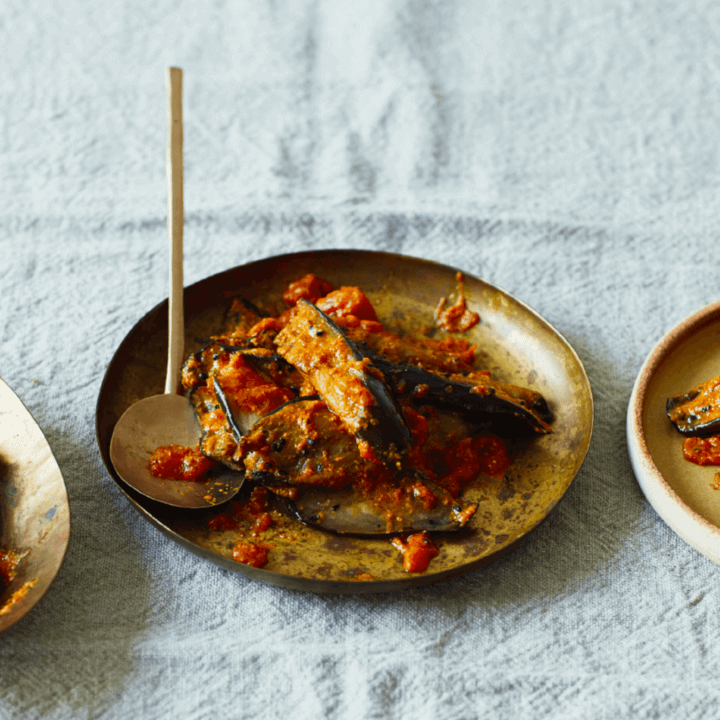
Taken from Mowgli: Street Food by Nisha Katona, this staple dish is a firm favourite in South Asian households! Full vegan and definitely delicious, read ahead for some words of wisdom from Nisha herself.

From Nisha: “Many Indians are vegan. Aubergine/eggplant is India’s best-loved vegetable and the reason for this, my Maa and I reckon, is because it is the closest many Indians get to that meat texture. We always fry the aubergine before we add our curry spices, unlike in Thai cuisine. This adds a caramelised sweetness to the flesh that does much of the legwork in creating the massive flavours in this dish.”

Taken from Mowgli: Street Food

PREP: 10 MINUTES
COOK: 30 MINUTES
SERVES 4

Ingredients
4 tbsp vegetable oil
1 tsp panch phoron
1 large dried red chilli
2 large aubergines/eggplants, cut into long, thin 5cm/2 inch slices
¼ tsp ground turmeric
¼ tsp chilli powder
1 tsp salt
1 tsp caster/granulated sugar
juice of ¼ lemon
250g/9oz canned chopped tomatoes
1 tablespoon chopped coriander/ cilantro leaves 

Method
1 Put the vegetable oil in a large non-stick frying pan set over a medium-high heat. When hot, add the panch phoron and fry until they start to crackle, then add the red chilli and aubergines and, turning the heat down to low, partially cover and cook for 10 minutes or until the aubergines are golden brown and tender.
2 Stir the ground turmeric, chilli powder, salt, sugar, lemon juice and the canned tomatoes into the aubergine mix and fry for a further 6 minutes until the oil has started to split out of the tomatoes. Garnish with the chopped coriander and serve. 

Happy cooking!
Don’t forget to tag us in your cooking Instas, #NourishBooks!

We’re sharing some bread you’ll just loaf for #RealBreadWeek!

This recipe is included in Slow Dough: Real Bread by Chris Young, it was contributed by Ursi Widemann. Here’s what she said: “I love pretzels! I could eat them every single day . . . maybe it’s because I’m Bavarian”.

Pretzels are usually dipped in a solution of sodium hydroxide (lye) prior to baking, which gives them their characteristic taste and shiny brown skin. As food-grade sodium hydroxide can be hard to obtain and is hazardous to handle, this recipe uses bicarbonate of soda/baking soda instead, which gets you safely toward a similar result.


Taken from Slow Dough: Real Bread


Makes: 12
From mixing to oven: 12–16 hours
Baking time: 15–20 minutes

Ingredients
For the pre-ferment:
125g/4½oz/¾ cup plus 2 tbsp wholemeal/wholewheat bread flour
20g/1½ tbsp rye sourdough starter
100g/3½oz/½ cup minus 1 tbsp water
For the dough:
375g/13oz/223 cups white bread flour
25g/1oz/2 tbsp butter
8g/1½ tsp fine/table salt
160g/5¾oz/23 cup water
For dipping:
1kg/2lb 4oz/4¼ cups water
20g/heaping 1½ tbsp bicarbonate of soda/baking soda
For the topping:
coarse sea salt flakes or crystals, or you could use sesame seeds, poppy seeds or caraway seeds

Method
1
Mix the pre-ferment ingredients together, cover and leave at room temperature for 8–12 hours until bubbly.
2 Mix the dough ingredients with the pre-ferment, and knead until you have a firm but supple dough: tighter than usual, but if it really is too stiff to work, add a little more water. Put the dough into a bowl, cover and leave to rise at room temperature for a further 3 hours, giving the dough a single fold halfway through this time.
3 Divide the dough into 12 equal-size pieces (65g/2¼oz), roll into balls, cover and leave for 20 minutes, then roll each piece into a strand about 25cm/10in long that tapers at the ends with a little belly in the middle. Bend each strand into a “U” shape, cross one side over the other about halfway up, give it a twist where they cross, then fold the ends up to meet the bend of the U and press down gently to fix in place. Cover the dough and leave to prove for 45–60 minutes.
4 Line a baking sheet with non-stick baking parchment and heat the oven to 230°C/210°C fan/450°F/gas 8. Meanwhile, bring the water to the boil in a large pan and add the bicarbonate of soda/baking soda. Drop the pretzels into the boiling liquid 2 or 3 at a time for 20 seconds, lift out with a slotted spoon and place onto the baking sheet. Immediately sprinkle with the topping of your choice while the dough is still tacky. Slash the dough at its fattest part and bake for 15–20 minutes until deep brown.

Happy baking! Don’t forget to tag us in your posts – #NourishBooks AND #RealBreadWeek!

If you’re on the lookout for recipes to add to your go-to meals repertoire, look no further than these (35-minute prep time!) Tostadas! The recipe is taken  from the hottest cookbook around, Fire and Spiceby John Gregory-Smith.

Taken from Fire and Spice

From John: ‘My tostadas were inspired by the wonderful giant tostadas of the Central Market in the city of Oaxaca in Mexico. They are completely delicious – you taste hot and cold, crunchy and smooth, spicy and mild, salty and sour in every bite…a real midweek lifesaver.’

Serves 4
Ready in 35 minutes

Ingredients
4 duck breasts (about 150g/5½oz each)
4 garlic cloves, crushed
2 tsp smoked paprika
½ tsp chilli powder
4 tbsp olive oil
400g/14oz/2 cups tinned black beans
1½ tsp ground cumin
juice of ½ lime
sea salt and freshly ground
black pepper
1 lettuce, finely sliced, to serve
2 large handfuls of coriander (cilantro) leaves, chopped
4 large tortillas, to serve

For the salsa
1 red onion, peeled and quartered
115g/4oz/heaped ¾ cup drained sun-dried tomatoes in oil
1 tsp smoked paprika juice of ½ lime

Method

1 Preheat the oven to 200°C/400°F/Gas 6. Trim and score the skin on the duck breasts, and put them in a small roasting tin. Add the garlic, smoked paprika, chilli powder, two tablespoons of the oil and a good pinch of salt. Mix well so that the duck is completely coated. Turn the duck skin-side up, then roast for 25–30 minutes until golden on the outside and juicy and pink in the centre.

2 Meanwhile, drain and rinse the beans and tip them into a saucepan over a medium heat. Mash the beans, using a potato masher, until fairly smooth, then add 55ml/1¾fl oz/ scant ¼ cup water, the rest of the olive oil and the cumin. Add the lime juice, season with salt and pepper, and mix well. Bring to the boil, reduce the heat to low and cook for 8–10 minutes, stirring occasionally, until warmed through and thick. Remove from the heat, cover and leave to one side.

3 To make the salsa, put the onion sun-dried tomatoes, smoked paprika and a pinch of salt into a food processor. Add the lime juice, blend until smooth, then pour into a serving bowl.

4 Finely slice the lettuce and coriander (cilantro), then put them on to a serving plate. Put the tortillas on four serving plates and cover each one with the beans. Slice up the duck and put on top of the beans. Serve with the salad and salsa.

Remember to tag us @NourishBooks on Instagram and Twitter if you use our recipes!

Have a hankering for sushi but looking to keep it vegan for #Veganuary? We’ve got the recipe for you! This Easy Vegan Sushi with Avocado recipe from Rose Elliot’s Complete Vegan – quick and delicious, ideal midweek meal inspiration.

Taken from Rose Elliot’s Complete Vegan


Makes 16–20 pieces

Ingredients

225g (8oz/scant 1¼ cups) sushi rice or pudding rice
300ml (10½ fl oz/1¼ cups) water
2 tsp rice vinegar or wine vinegar
2 tsp caster (superfine) sugar
4–5 sheets of nori seaweed
1 red (bell) pepper, deseeded and cut into long strips
4–5 asparagus spears, cooked and drained
flesh of 1 avocado, cut into long strips
salt and freshly ground black pepper, to taste
TO SERVE:
toasted sesame seeds, to garnish (optional)
soy sauce, for dipping
pickled ginger, to taste
wasabi paste, to taste

Method

Place the rice in a saucepan with the water and bring to the boil, uncovered. Cover, reduce the heat and cook for about 12 minutes, or until the water is absorbed and the rice cooked. Allow to cool for a few minutes, then stir in the rice vinegar and sugar. You can use the rice to make the sushi as soon as it’s cool enough to handle.

To make the sushi rolls, place a piece of nori, shiny-side down, on a board and lightly cover it with the rice, leaving a 1-cm (½-in) gap at the end farthest from you. Place a row of red (bell) pepper strips on top of the rice, at the end closest to you, about 2.5cm (1in) from the edge. Lay some asparagus spears next to the red pepper and a line of avocado strips next to that. Fold over the edge of the nori closest to you, quite firmly, then continue to roll the nori up, like a Swiss roll. Continue to make sushi rolls in this way until all the ingredients have been used up, then refrigerate until required.

To serve, trim the two ends of each roll (these tend to be a little untidy), then cut the rolls into 4 or 5 pieces. Place them, filling-side up, on a serving plate and sprinkle with a few toasted sesame seeds, if you like. Serve with the soy sauce for dipping – it’s nice to give each person their own tiny bowl of sauce – and some wasabi paste and pickled ginger.

Remember to tag us @NourishBooks on Instagram and Twitter if you use our recipes!

Recipes for #Veganuary2021 continue! This glorious chocolate cake recipe was taken from Virtually Vegan by Heather Whinney.

The best bit about this cake is that you can lick the spoon knowing there is no raw egg involved. Don’t expect the same rise you would get for a cake with eggs – but it will still look the part once sandwiched together and piled with chocolate frosting.

Taken from Virtually Vegan by Heather Whinney

Serves 8 | Prep: 15 mins | Cook: 30 mins

Ingredients

85g/3oz/scant ⅓ cup dairy-free spread
2 tbsp maple syrup
1 tsp apple cider vinegar
300g/10½ oz/2½ cups self-raising/self-rising flour
2 tbsp dairy-free cocoa/unsweetened chocolate powder, at least 70% cocoa, plus extra for dusting
100g/3½ oz/½ cup golden caster/superfine sugar
1 tsp bicarbonate of soda/baking soda
½ vanilla pod, seeds only
300g/10½ oz fresh raspberries, roughly chopped, leave some whole for topping

FOR THE TOPPING:

200g/7oz dairy-free dark chocolate, at least 70% cocoa
80g/3oz dairy-free spread
2 tbsp almond milk or dairy-free milk of your choice
6–8 tbsp icing/confectioners’ sugar, sifted plus a dusting for decoration if you wish

Method

1 Preheat the oven to 180°C/350°F/Gas 4 and base-line two 20cm/8in cake pans with parchment paper.

2 Put the dairy-free spread in the bowl of a food mixer, add the maple syrup, apple cider vinegar and 300ml/10½fl oz/1¼ cups of boiling water. Mix slowly until the spread has melted and everything is combined.

In another bowl, put the flour, cocoa, sugar, bicarbonate of soda/baking soda and the vanilla seeds and stir. Add this to the wet mixture and beat on slow until you have a smooth batter.

Divide the mixture between the pans, smooth the top and bake for about 20–30 minutes (check after 20 minutes), or until a skewer poked into the middle comes out clean.

Leave the cakes to cool in the pans for 10 minutes, then invert onto a wire rack to cool completely.

6  To make the frosting, put the chocolate and dairy- free spread in a heatproof bowl. Sit it over a pan of just simmering water and stir occasionally until melted. Remove from the heat and leave to cool a little, then stir in the milk and slowly add the icing/confectioners’ sugar, beating as you go, until it begins to thicken and become glossy. Put in the refrigerator to set.

To assemble the cake, remove the frosting from the refrigerator and beat until glossy. Spread generously over one of the sponges, top with most of the raspberries then top with the other sponge and cover with the remaining frosting, and use a knife to neaten. Top with the remaining raspberries and a dusting of icing/confectioners’ sugar or cocoa, if using.

We’re almost halfway through January, plus it’s Thursday, it’s time for a little chocolate flavoured indulgence. Don’t forget to tag us, @NourishBooks, if you give any of our recipes a try!

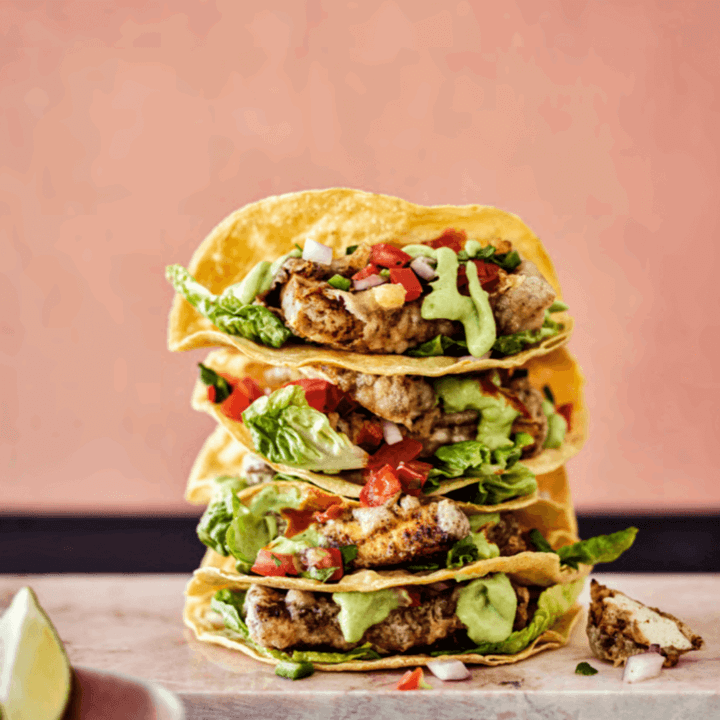
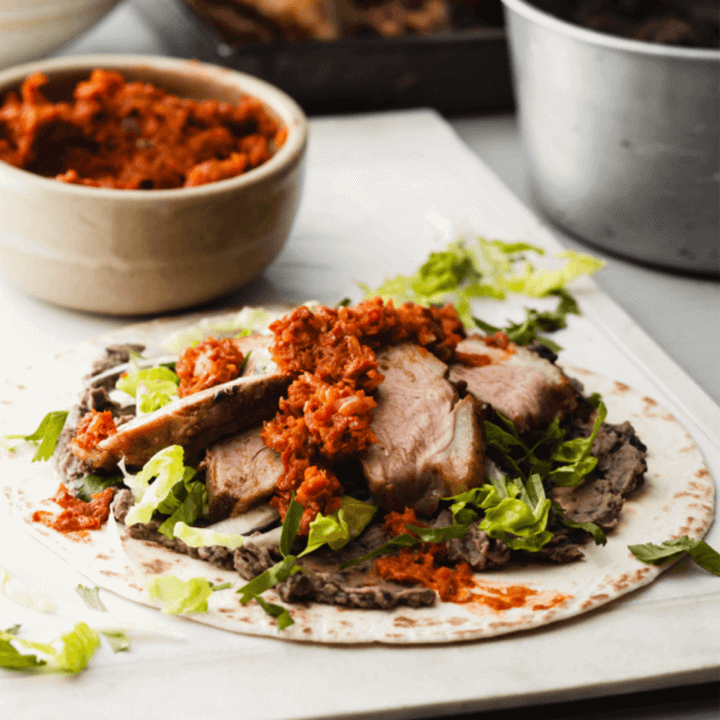
Who knew #Veganuary and #TacoTuesdays were so meant to be! This recipe was taken from The Part-Time Vegetarian’s Year by Nicola Graimes.

Crisp, golden, batter-coated tofu, a summery pea crema and a zingy salsa with a corn tortilla – what’s not to like? If you’re using fresh peas, don’t forget to save the pea pods; they make a flavoursome light vegetable stock.

Taken from The Part-Time Vegetarian’s Year


Serves 4
Preparation time: 30 minutes
Cooking time: 20 minutes

Ingredients

165g/5¾oz/scant 1¼ cups plain/all-purpose flour
2 tsp cornflour/cornstarch
300ml/10½fl oz/1¼ cups light ale
4 tsp chipotle powder
4 tsp ground cumin
sunflower oil, for deep-frying
550g/1lb 4oz block of firm tofu, drained cut into 2cm/¾in wide x 1cm/½in thick fingers
sea salt and freshly ground black pepper

PEA CREMA
1 large avocado, stone removed and flesh scooped out
55g/2oz/⅓ cup cooked peas
4 tbsp crème fraîche
1 large garlic clove, peeled
juice of 1 lime
1 green jalapeño chilli, deseeded and chopped

TOMATO AND CORIANDER SALSA
4 vine tomatoes, deseeded and diced
1 handful of fresh coriander/cilantro leaves, chopped
½ small red onion, diced
1 green jalapeño chilli, deseeded and chopped
juice of ½ lime

TO SERVE
8 corn tacos
2 Little Gem/Bibb lettuces, shredded
chilli sauce (optional)

Method

To make the batter, sift the flour and cornflour/cornstarch into a large mixing bowl. Season generously with salt and pepper. Make a well in the middle and gradually whisk in the ale to make a smooth, fairly thick batter. Set aside to rest. Mix together the chipotle powder and cumin on a plate.

Blend together all the ingredients for the pea crema in a blender or mini food processor (or mash with a fork if you like a chunky mix), then season. Taste and add more lime, if needed.

Mix together all the ingredients for the salsa in a bowl, then season.

Place the tacos on a baking sheet and warm in the oven preheated to 180°C/350°F/Gas 4.

To prepare the tofu, heat enough oil to half-fill a deep heavy saucepan to 176°C/350°F (or until a cube of bread turns golden and crisp in 40 seconds). Pat dry the tofu slices with paper towels, making sure you get rid of as  much moisture as possible, then dust in the chipotle mix until coated all over. Dunk the tofu, one slice at a time, into the batter until well coated, then lower it into the hot oil. Cook 3 slices of tofu at a time for 11/2–2 minutes until light golden and crisp. Remove with a slotted spoon, drain on paper towels and keep warm in a low oven. Repeat until you have cooked all the tofu.

To assemble, place some lettuce in a taco shell, top with 2–3 slices of tofu and a good spoonful of the salsa, followed by the pea crema. Finish with a dash of chilli sauce, if you like, and serve with extra wedges of lime on the side.

#Veganuary2021 is going strong with this glorious recipe! Nicola does offer a part-time variation to mix things up – swap out the tofu for white fish fillets! Cut them into bite-sized chunks, coat in the spiced flour and batter, then deep fry until crispy and golden brown. Delicious!

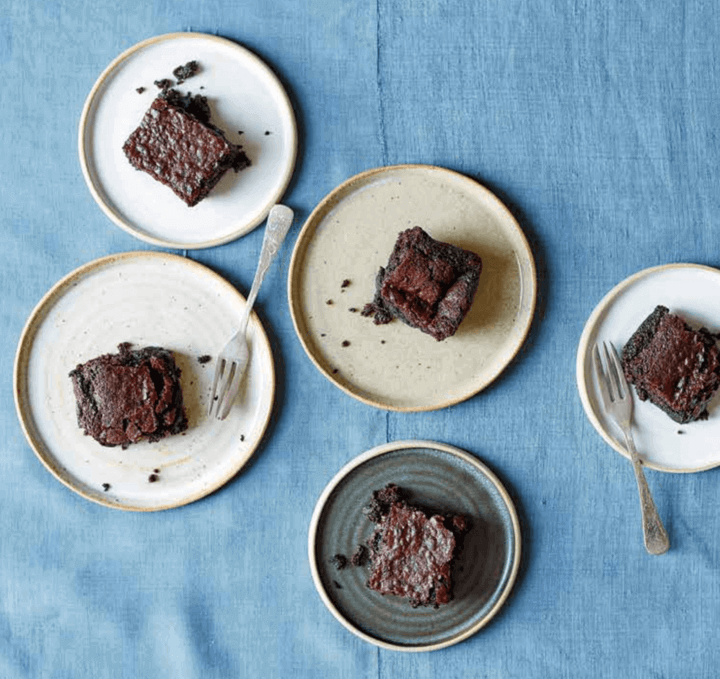
We’re keeping the #Veganuary train running with this truly necessary comfort food recipe – BROWNIES!

Quick, easy and delicious brownies from Rose Elliot’s Complete Vegan


From Rose: ‘These brownies are the result of my many attempts at making ‘the perfect vegan brownie’. For me, it’s perfect just as it is, but if you want it even more ‘fudgy’ you can simply double the amount of chocolate and bake the brownies for a few minutes longer. Either way, they are quite delicate when they first come out of the oven, but they soon firm up. In fact, they are even more delicious the next day and keep well… if they are allowed to. I hope you will enjoy them.’

Makes 15

Ingredients

100g (3½oz) plain (semisweet) vegan chocolate

100g (3½oz/scant ½ cup) vegan spread

125g (4½oz/scant ⅔ cup) soft brown sugar

4 tbsp soy or other plant-based milk

1 tsp cider vinegar or wine vinegar (red or white)

75g (2¾oz/generous ½ cup) self-raising (self-rising) flour

¼ tsp salt

¼ tsp baking powder

½ tsp bicarbonate of soda (baking soda)

Method

Preheat the oven to 170°C/340°F/gas mark 4.

Line the base and sides of a 20cm (8in) square baking tin (pan) with 2 strips of good-quality non-stick baking paper (so that the bottom has a double layer of paper).

Break the vegan chocolate into pieces and put them into a saucepan along with the vegan butter and sugar. Heat gently until melted, then remove from the heat.

Meanwhile, mix the milk with the vinegar in a bowl and set aside to curdle.

Sift the flour, salt, baking powder and bicarbonate of soda (baking soda) into the chocolate mixture and stir until well combined. Add the curdled milk and mix quickly with a wooden spoon until combined, then thump the pan on the work surface to get rid of any air bubbles. Tip the mixture into the prepared tin, spreading it to the edges, then thump the tin sharply on the surface once again.

Bake for about 20 minutes until firm.

Let cool, then cut into pieces in the tin. The brownies become firmer and fudgier as they cool. They keep well stored in a tin.

Happy #Veganuary baking everyone! These brownies hit the spot every time, forgoing meat shouldn’t mean you forgo your favourite foods – especially in a time when everyone deserves some comfort food ❤️